Introduction
As the backbone of numerous financial applications on the blockchain, writing code in Solidity and challenging at the same time. Our goal, as developers, is not just to write code, but to write code that you can trust – confidently.
In recent times, Solidity has become a hotspot for developers, many of whom are just starting with their programming journey. As most smart contracts handle sensitive financial transactions touching user's funds, that doesn't seem good. Well experienced developers usually bring a security-first mindset to their coding practices. For newcomers without any prior experience, understanding the intricacies of secure and reliable coding in Solidity can be quite challenging.
This is where this guide comes in. This handbook has been crafted to be a companion in navigating the fundamentals of testing Solidity smart contracts. I understand that there are multiple guides out there, but the resources are scattered. This handbook doesn't dive deep into specific testing pattern, but this should serve as a very good starting point to understand specific testing patterns and best practices. It doesn't stop at the basics tho. This guide also walks you through advanced strategies like mutation testing and the branching tree technique, helping you understand when and how to apply them.
At the end of the day, Solidity smart contracts are just a piece of software. Many protocols rely only on unit tests, or they just have a one large test suite focused on fork testing. But I feel that's not sufficient. The number of attacks on the ecosystem doesn't seem to reduce. Each testing method serves a unique purpose, helping developers uncover vulnerabilities in specific parts of the code. For example, fuzz tests are great for finding edge cases in simple mathematical functions, while symbolic testing shines in complex calculation scenarios.
It's crucial to recognize that not all testing methods fit every project. For instance, invariant tests might be challenging to implement when building on top of other protocols.
Getting good at testing:
Alright, let's talk about getting good at testing in Solidity, kind of like learning to ride a bike. You cannot master it overnight. And this is not a zero-to-hero guide. You just have to keep riding, falling off, and then getting back on again. Testing is the same. You write a test, it goes all wonky, and then you fix it. It's all part of the game.
Think of your code like a bunch of Lego blocks. Sometimes you think you’ve built the coolest spaceship, but then you notice it's missing a door or a wheel. That's what bugs in code are like. They're those missing pieces that you only spot when you test. And guess what? Everyone misses a piece now and then. Even the best of us!
Heads up!
This guide isn't your typical, super-serious, polished-to-perfection kind of thing. It actually started as a bunch of notes I jotted down for myself. It’s more like a casual chat over coffee, sharing what I've learned and what others have shared over time.
We’re going to take this nice and easy. No rush. Testing in Solidity, or any coding really, should be fun, not a headache.
Ok. Now make yourself a cup of tea and come back. Let's start with the B A S I C S.
Basic Testing
Basic tests are the crucial to have tests for all contracts. These tests should go hand in hand with feature development. By including these tests early, you can identify and address issues promptly, saving time and effort in the long run.
Types:
-
Unit Tests: These are the most fundamental type of tests where you check individual functions or components in isolation. They are quick to run and help in identifying the smallest of issues which might be overlooked otherwise.
-
Integration Tests: These tests check how different parts of your application work together. They are crucial for ensuring that the combination of various components or functions in your codebase interact as expected.
-
Fork Tests: Fork testing involves creating a fork of the network and then deploying your contracts to test in an environment that closely mimics the on-chain network. This helps in understanding how the contracts will behave under real-world conditions.
-
Fuzz Tests: In fuzz testing, you input random, invalid, or unexpected data to your contracts and observe how they handle such inputs. This type of testing is excellent for discovering vulnerabilities and ensuring your contracts can handle unexpected or incorrect inputs gracefully.
Remember, each type of test serves a unique purpose and contributes to building robust and secure core. These tests can help uncover approximately 90% of potential issues in your code if implemented properly.
Note: I'll be using Foundry for demonstrating the testing strategies, but you can apply them irrespective of the framework.
Unit tests
Unit testing is the simplest form of testing. As the name suggests, each unit test should just test one thing at a time. It involves testing the smallest parts of your code – often individual functions – to ensure they work as expected.
Key Characteristics:
- Isolation: Should focus on a single functionality.
- Speed: Should run quickly to facilitate rapid iterations.
- Independence: Must not rely on external systems or states.
For example, let's implement unit tests for a simple SetterGetter contract.
contract SetterGetter {
    uint256 public number;

    function setNumber(uint256 newNumber) public {
        number = newNumber;
    }

    function getNumber() public view returns (uint256 _number) {
        _number = number;
    }
}
You can see that there are only 2 key methods available in the above contract.
- Setting value to the
number. - Retrieving the value stored.
Unit testing the setNumber() method:
  function test_setNumber() public {
        getterSetter.setNumber(10);
        assertEq(getterSetter.number(), 10);
    }
As mentioned earlier, the above function tests only one functionality: setNumber(). Note that in the assertion getterSetter.number() is used for validation and not getterSetter.getNumber(). Even though it doesn't make a big difference, we are avoiding the assumption that the user defined getNumber() method returns the actual value stored in the state number. Fewer assumptions help us implement more reliable tests!!
💡 Random Tip:
Solidity compiler includes a getter method for all the public variables (for simple types like
uint,bytes32,address, etc.). So if you need to reduce your contract's bytecode size, you can change the variables' scope tointernalorprivateand expense only the required values via a getter. You can read more about this here.
So it's always a good practice to test the actual state change by reading it directly. By doing so, we are trusting the Solidity's auto-generated getter method rather than the user-defined one. When writing tests, the developer should think like an attacker to figure out what could go wrong with the given function. It's the most difficult part in writing tests: identifying edge cases. This is where some techniques like BTT comes into picture, which we'll cover as a separate chapter.
If possible, protocols should avoid asking the developer(s) responsible for developing the feature to test it.
Do not over test!
When writing tests, it's easy to go beyond the boundaries and start over testing the functions. By over-testing, I mean, writing tests that adds very little to no value at all. Tests should be meaningful.
One example would be to pass a value greater than what uint256 can hold and make sure it fails:
- Passing an invalid type as input (string, address, etc.) to make sure it fails.
   function testFail_setNumber() public {
        cut.setNumber(type(uint256).max + 1);
    }
We already know that Solidity provides overflow protection by default. The goal is to test the user logic, not the compiler. Therefore, it's better to avoid these kinds of tests.
Okay, now let's get back to our setNumber() unit test:
  function test_setNumber() public {
        getterSetter.setNumber(10);
        assertEq(getterSetter.number(), 10);
    }
Even though, this test works fine in our case, we're making another assumption here that the setNumber() actually updates the value. Consider the implementation of the setNumber() method as follows:
uint256 public number = 10
function setNumber(uint256 value) public {}
The previous test works for this too. But is this a valid implementation? No.
So what do we do about this?
Good question. In order to avoid such scenarios, we need to make sure that the state change actually happens. To test a state change, the best way is to validate the before and after value of the state. So the test would become something like:
  function test_setNumber() public {
        uint256 numberBefore = getterSetter.number();
        getterSetter.setNumber(10);
        uint256 numberAfter = getterSetter.number();

        assertEq(numberBefore, 0);
        assertEq(numberAfter, 10);
    }
The scenario explained here is quite simple, but it could be more useful if you apply such testing techniques in real-world applications, for example, transfer() method of the ERC20 spec, should reduce the sender's balance while increasing the recipient's balance. But most protocols don't make this explicit check in their deposit() method where token transfer takes place. They only check for the recipient's balance after transfer. The more robust check would be to check before and after balances of both the sender and the recipient to avoid the assumption that the underlying token actually follows the ERC20 spec and is not malicious.
Implementing test for getNumber() method:
For the getter method, the test would be straightforward.
Simpler version (more assumptions):
   function test_getNumber_Simple() public {
        getterSetter.setNumber(10);
        assertEq(getterSetter.getNumber(), 10);
    }
Robust version (less assumptions):
    function test_getNumber_Robust() public {
        getterSetter.setNumber(322e26);
        assertEq(getterSetter.getNumber(), 322e26);
        assertEq(getterSetter.getNumber(), getterSetter.number());

        getterSetter.setNumber(0);
        assertEq(getterSetter.getNumber(), 0);
        assertEq(getterSetter.getNumber(), getterSetter.number());
    }
I'll leave it to the readers to examine how the latter test is quite stronger than the former.
All the code snippets in this guide are available on the GitHub for your reference.
Mocking:
In some cases, you might need to mock certain calls to unit test the functions. For ex, consider a deposit() function in which some ERC20 tokens are transferred to a Vault contract. Instead of deploying a mock erc20 contract and trying to perform an actual transferFrom() call, you can use vm.mockCall() cheatcode (from Foundry) and make the transferFrom() call to return true so that you can go ahead and test the actual logic ignoring the nuances of setting up a token contract. This facilitates the testing of the contract's logic in isolation, bypassing the complexities associated with setting up and interacting with other contracts.
deposit() method:
function deposit(uint256 _amount) external {
        require(token.transferFrom(msg.sender, address(this), _amount), "Transfer failed");
        balances[msg.sender] += _amount;
    }
Unit test:
// Vault.t.sol
contract VaultTest is Test {
...
address tokenA = makeAddr("TokenA");
...

function test_deposit() external {
    vm.mockCall(address(tokenA), abi.encodeWithSelector(IERC20.transferFrom.selector), abi.encode(true));
    vault.deposit(10);
    assert(vault.balances(address(this))== 10);
  }
}
This approach enables focused testing on the contract in question, allowing for a more efficient and targeted validation of its logic and behavior. For comprehensive testing that involves the entire transaction flow and interaction between multiple contracts, integration tests should be implemented.
Integration tests
Unit testing is a vital step in ensuring each individual contract works as expected. However, protocols often involve several contracts working together. It's crucial to check that these contracts interact correctly, which is where integration testing becomes essential. The goal of the integration test should be to ensure that our contracts work together as expected, without focusing on the behavior of external contracts.
Points to note:
- It is essential to simulate the actual deployment environment as closely as possible, which means using real contract deployments instead of mocks. This ensures the tests reflect real-world operation and interactions.
- Integration tests should concentrate on the interaction between contracts rather than repeating validations of internal logic covered by unit tests. This approach keeps tests focused and avoids redundancy.
- Typically, integration tests follow unit tests in the development cycle. Once individual components are verified to work as expected, integration tests assess the system's overall functionality.
Consider a "Governance" contract that manages a Vault contract that manages deposits and withdrawals of ERC20 tokens. To ensure the governance and vault contracts operate without breaking, proper integration tests should be implemented. This confirms that the protocol functions properly as a whole, not just in isolation.
Example:
Below is a simple example for illustrating the integration test. There is a Governance contract that sets a value in the Vault contract.
contract Governance {
    address public owner;
    mapping(address vault => uint256 rewardRate) rewardRates;

    constructor() {
        owner = msg.sender;
    }

    modifier onlyOwner() {
        require(msg.sender == owner, "Only the owner can perform this action");
        _;
    }

    function setRewardRate(address _vaultAddress, uint256 _rewardRate) public onlyOwner {
        rewardRates[_vaultAddress] = _rewardRate;
        IVault(_vaultAddress).setRewardRate(_rewardRate);
    }
}
Vault contract:
contract Vault {
...
 function setRewardRate(uint256 _rewardRate) public onlyGovernance {
        rewardRate = _rewardRate;
    }
...
}
To ensure integration tests are effective and reflect real-world scenarios, it's important to set up the testing environment accurately. This means using actual contract deployments rather than mock addresses or simplified versions. The goal is to closely mimic how these contracts would interact in a live setting rather than using mocks.
So the integration test for the above contract would look something like:
contract GovernanceIntegrationTest is Test {
    Vault vault;
    Governance governance;

    function setUp() public {
        governance = new Governance();
        vault = new Vault(address(governance));
    }

    function testGovernanceUpdatesRewardRate() public {
        uint256 newRewardRate = 100;
        governance.setRewardRate(address(vault), newRewardRate);

        assertEq(vault.rewardRate(), newRewardRate, "Vault's rewardRate should be updated to 100");
    }
}
The above test validates that the reward rate in the vault contract has been successfully updated by the governance contract. You can also notice that we're not validating if the rewardRates mapping is updated with the reward rate as it should be a unit test.
💡 Random Tip:
To test the functions with external call to other contracts, you can follow the mocking technique discussed in the Unit test chapter.
Key takeaways:
- Integration test should come after unit tests.
- All contracts should be properly setup, avoiding mock contracts.
- Should not repeat the validations performed in the unit tests.
Fork tests
Fork tests are very similar to Integration tests. Fork tests ensure that our contracts works together as expected but in a live environment without or less mocking. This helps us mimic the behavior of the smart contracts post deployment, helping us catch any unexpected behavior.
While mocks can help you test basic interactions quickly, they often don’t capture real-world behavior, meaning critical bugs can slip through unnoticed. This is where fork tests come in.
In this chapter, we'll walk through a simple example of how fork tests can be helpful. For this example, we can consider a simple LiquidityAdder contract that has a function to add liquidity.
contract LiquidityAdder {
    IUniswapV2Router02 public uniswapRouter;

    constructor(address _uniswapRouter) {
        uniswapRouter = IUniswapV2Router02(_uniswapRouter);
    }

    function addLiquidity(
        address tokenA,
        address tokenB,
        uint amountADesired,
        uint amountBDesired
    ) external returns (uint amountA, uint amountB, uint liquidity) {
        IERC20(tokenA).transferFrom(msg.sender, address(this), amountADesired);
        IERC20(tokenB).transferFrom(msg.sender, address(this), amountBDesired);

        IERC20(tokenA).approve(address(uniswapRouter), amountADesired);
        IERC20(tokenB).approve(address(uniswapRouter), amountBDesired);

        return uniswapRouter.addLiquidity(
            tokenA,
            tokenB,
            amountADesired,
            amountBDesired,
            0,
            0,
            msg.sender,
            block.timestamp
        );
    }
}
The function addLiquidity() in the above contract just pulls the tokens from the user and adds liquidity to the uniswap v2 pool. Let's add a unit test for the above method.
contract LiquidityAdderTest is Test {
    LiquidityAdder liquidityAdder;
    address constant UNISWAP_ROUTER = address(0xdeadbeef);

    function setUp() public {
        liquidityAdder = new LiquidityAdder(UNISWAP_ROUTER);
    }

    function testAddLiquidityMock() public {
        address tokenA = address(0x1);
        address tokenB = address(0x2);

        // Mock token transfers
        vm.mockCall(
            tokenA,
            abi.encodeWithSelector(IERC20.transferFrom.selector),
            abi.encode(true)
        );
        vm.mockCall(
            tokenB,
            abi.encodeWithSelector(IERC20.transferFrom.selector),
            abi.encode(true)
        );

        // Mock the addLiquidity function call
        vm.mockCall(
            UNISWAP_ROUTER,
            abi.encodeWithSelector(IUniswapV2Router02.addLiquidity.selector),
            abi.encode(1000, 1000, 1000)
        );

        (uint amountA, uint amountB, uint liquidity) = liquidityAdder.addLiquidity(tokenA, tokenB, 1000, 1000);

        assertEq(amountA, 1000);
        assertEq(amountB, 1000);
        assertEq(liquidity, 1000);
    }
}
When you run the above test it passes. Voila! But does it actually validate that the logic works onchain after deploying the contracts? To make sure it works, let's implement a fork test with real mainnet address without any mocks.
contract LiquidityAdderForkTest is Test {
    LiquidityAdder liquidityAdder;
    address constant UNISWAP_ROUTER = 0x7a250d5630B4cF539739dF2C5dAcb4c659F2488D;
    address constant USDC = 0xA0b86991c6218b36c1d19D4a2e9Eb0cE3606eB48;
    address constant WETH = 0xC02aaA39b223FE8D0A0e5C4F27eAD9083C756Cc2;
    address constant TOKEN_WHALE = 0x8EB8a3b98659Cce290402893d0123abb75E3ab28;

    function setUp() public {
        // Fork Ethereum mainnet
        vm.createSelectFork("https://rpc.flashbots.net");
        liquidityAdder = new LiquidityAdder(UNISWAP_ROUTER);
    }

    function testAddLiquidityFork() public {

        vm.startPrank(TOKEN_WHALE);
        IERC20(USDC).approve(address(liquidityAdder), 1000e6);
        IERC20(WETH).approve(address(liquidityAdder), 1 ether);

        (uint amountA, uint amountB, uint liquidity) = liquidityAdder.addLiquidity(USDC, WETH, 1000e6, 1 ether);
    }
When you run the above test, you can see it fails with the following error:
    │   │   ├─ [8384] 0xA0b86991c6218b36c1d19D4a2e9Eb0cE3606eB48::transferFrom(LiquidityAdder: [0x5615dEB798BB3E4dFa0139dFa1b3D433Cc23b72f], 0xB4e16d0168e52d35CaCD2c6185b44281Ec28C9Dc, 1000000000 [1e9])
    │   │   │   ├─ [7573] 0x43506849D7C04F9138D1A2050bbF3A0c054402dd::transferFrom(LiquidityAdder: [0x5615dEB798BB3E4dFa0139dFa1b3D433Cc23b72f], 0xB4e16d0168e52d35CaCD2c6185b44281Ec28C9Dc, 1000000000 [1e9]) [delegatecall]
    │   │   │   │   └─ ← [Revert] revert: ERC20: transfer amount exceeds allowance
    │   │   │   └─ ← [Revert] revert: ERC20: transfer amount exceeds allowance
    │   │   └─ ← [Revert] revert: TransferHelper: TRANSFER_FROM_FAILED
    │   └─ ← [Revert] revert: TransferHelper: TRANSFER_FROM_FAILED
    └─ ← [Revert] revert: TransferHelper: TRANSFER_FROM_FAILED
You might be surprised to find that it fails! The error message indicates that the Uniswap router reverted the transaction. What happened?
The issue is in our LiquidityAdder contract. We're transferring tokens to the contract itself, but we never approved the Uniswap router to spend these tokens on behalf of the contract. The mock test didn't catch this because we mocked all the calls, but the fork test revealed the bug. We can see how fork tests can be useful even if we have unit/integration tests in place.
Some foundry tips for fork tests:
createSelectFork()cheatcode helps you to create and make the fork active.createFork()just helps you to create forks. Both the cheatcodes return aforkId.- Use
selectFork(forkId)to switch between chains during your fork tests. Remember to usevm.makePersistent()cheatcode to persist deployment across the selected forks. - To make the fork tests faster, pass the block number when creating the fork next to the URL param.
- Use tools like mesc to automatically fetch the RPC url in your tests. For example:
   function fetchRpcUrlFromMesc(string memory networkName) internal returns (string memory url) {
       string[] memory inputs = new string[](3);
       inputs[0] = "mesc";
       inputs[1] = "url";
       inputs[2] = networkName;

       bytes memory res = vm.ffi(inputs);
       url = string(res);
   }

   function setUp() public {
       string memory network = "avax-c-chain";
       uint256 cchainForkId = vm.createSelectFork(fetchRpcUrlFromMesc(network), 41022344);
       network = "eth-mainnet";
       uint256 mainnetForkId = vm.createSelectFork(fetchRpcUrlFromMesc(network), 19120056);
       // Do something
    }
[!TIP] You can find more foundry related tips and techniques in my blog post here.
Do we even need integration tests?
Now you might ask since mocking is dangerous and error-prone do we even need integration tests? The answer is it depends. The example we saw is quite basic. For complex protocol, single function might interact with multiple different contracts (both internal and external). In such cases, integration tests help us carefully curate tests to identify edge cases in different interactions. Also integration tests are fast. So yes, in most cases integration tests provides value.
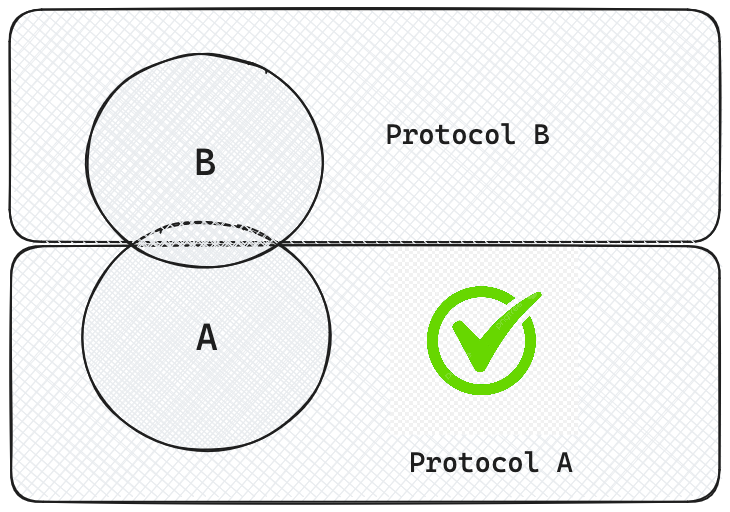
For some protocols, integration tests might not be the most effective approach, especially when dealing with a single contract that primarily interacts with external protocols. On the other hand, for protocols that don't rely on external contract calls, fork tests may not add much value.
Therefore, it's important to tailor the test suite to the specific needs of the protocol, by focusing on what makes sense for each scenario. It provides a much higher level of confidence before deploying your contracts to mainnet.
Recap:
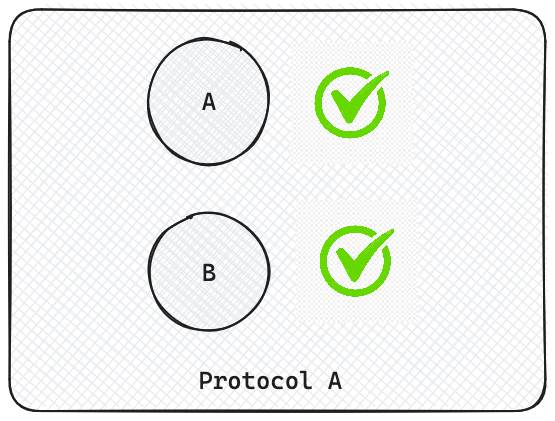
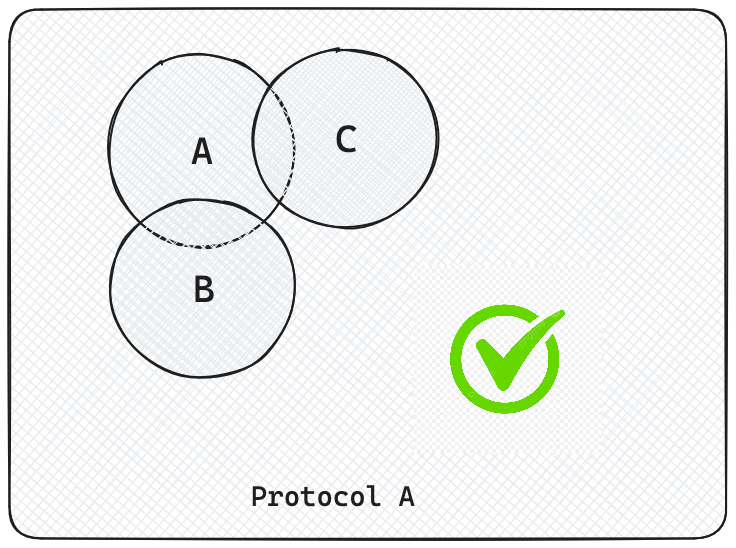
So far we've looked into unit tests, integration tests and fork tests. Each method is all useful in its own aspect. When implemented correctly most bugs can be found with these tests. By having these three types of tests are sufficient enough to make the test suite strong enough against attacks for very basic contracts that doesn't do any crazy stuff.
Fuzz tests
As mentioned in the previous section, unit, integration and fork tests are sufficient enough for most protocols to get a decent enough test suite that helps find most of the low hanging bugs. However, there are times when they might not catch every possible bug, especially in complex smart contracts that has functions that involve heavy math.
While the basic tests can check the obvious scenarios, they might miss unexpected edge cases. What happens if someone inputs a number that's way larger than you anticipated? Or a negative number when only positives make sense?
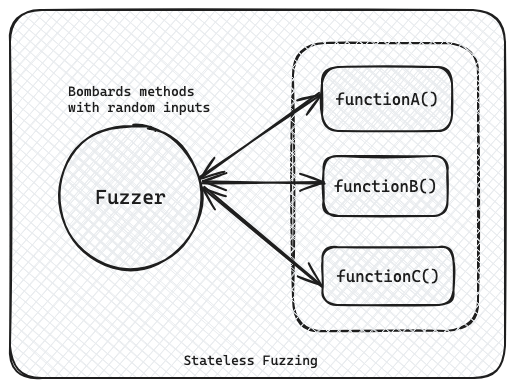
This is where fuzz tests come in handy. Fuzz testing involves bombarding your functions with a wide range of random, unexpected inputs to see how they react. It's like throwing everything but the kitchen sink at your code to ensure it can handle anything that comes its way.
Types:
There are 2 types of fuzzing.
- Stateful
- Stateless
Stateless tests are the basic ones. They don't keep track of the state or the sequence of the calls, so they're fast.
Stateful fuzzing are also called invariant tests as they make sure the defined invariant holds despite calling multiple methods in random sequence several times. We'll look into Invariant tests in the next chapter. Currently we focus on Stateless fuzz tests.
Example:
Let's look into a simple example to demonstrate how to setup fuzz tests using Foundry and how it can be beneficial in finding hidden bugs.
Consider the following simplified lending protocol implementation:
contract SampleLending {
    uint256 public constant FEE_PERCENTAGE = 1000; // 10%
    address public feeReceiver;

    constructor(address _feeReceiver) {
        feeReceiver = _feeReceiver;
    }

    function calculateInterest(uint256 principal, uint256 rate, uint256 time) public pure returns (uint256 interest, uint256 fees) {
        interest = (rate * principal * time) / 10000 / 365 days;
        fees = (FEE_PERCENTAGE * interest) / 10000;
        interest -= fees;
    }

    function repay(address token, uint256 principal, uint256 rate, uint256 time) external {
        (uint256 interest, uint256 fees) = calculateInterest(principal, rate, time);
        IERC20(token).transferFrom(msg.sender, feeReceiver, fees);
    }
}

contract MockToken {
    mapping(address => uint256) private _balances;
    mapping(address => mapping(address => uint256)) private _allowances;

    function mint(address account, uint256 amount) external {
        _balances[account] += amount;
    }

    function transferFrom(address sender, address recipient, uint256 amount) external returns (bool) {
        require(amount > 0, "Cannot transfer zero tokens");
        require(_balances[sender] >= amount, "Insufficient balance");
        require(_allowances[sender][msg.sender] >= amount, "Insufficient allowance");

        _balances[sender] -= amount;
        _balances[recipient] += amount;
        _allowances[sender][msg.sender] -= amount;
        return true;
    }
 }
This contract calculates interest and fees for a loan and facilitates repayment. At first glance, it appears to be a straightforward implementation. Let's write some tests to validate the logic.
Unit Test:
Unit test for this function would be something like this:
function testRepayment() public {
    uint256 principal = 1000 ether;
    uint256 rate = 1000; // 10% APR
    uint256 time = 30 days;

    (uint256 interest, uint256 fees) = protocol.calculateInterest(principal, rate, time);
    assertGt(fees, 0, "Fees should be greater than zero");

    vm.startPrank(address(this));
    token.mint(address(this), fees);
    token.approve(address(protocol), type(uint256).max);
    protocol.repay(address(token), principal, rate, time);
    vm.stopPrank();
}
This test passes successfully, giving us a false sense of security. It verifies that the contract works as expected for a specific, "happy path" scenario.
Adding the fuzz test:
Now, let's consider a fuzz test for the same contract:
function testFuzz_Repayment(uint256 principal, uint256 rate, uint256 time) public {
    vm.assume(principal > 0 && principal <= 1e36); // Max 1 billion tokens with 18 decimals
    vm.assume(rate >= 10 && rate <= 100000); // 0.1% to 1000% APR
    vm.assume(time >= 100 && time <= 365 days);

    (uint256 interest, uint256 fees) = protocol.calculateInterest(principal, rate, time);

    vm.startPrank(address(this));
    token.mint(address(this), fees);
    token.approve(address(protocol), type(uint256).max);

    protocol.repay(address(token), principal, rate, time);
    vm.stopPrank();
}
This fuzz test generates random values for principal, rate, and time within reasonable bounds. By doing so, we can use a vast range of possible inputs, helping us identify edge cases.
Running the fuzz test reveals an important issue: the contract fails when the calculated fees/interests are zero. The output would be something like this:
[FAIL. Reason: revert: Cannot transfer zero tokens; counterexample: calldata=0x92d09fa000000000000000000000000000000000000000000000000000000000000003b1000000000000000000000000000000000000000000000000000000000000028f0000000000000000000000000000000000000000000000000000000000001613 args=[945, 655, 5651]] testFuzz_Repayment(uint256,uint256,uint256) (runs: 0, μ: 0, ~: 0)
Logs:
  Principal: 945
  Rate: 655
  Time: 5651
  Fees: 0
  Interest: 0
This occurs because some ERC20 token implementations (similar to our MockToken) revert on zero-value transfers (like fee-on-transfer tokens), a behavior our contract doesn't account for.
The root of the problem lies in the repay function:
function repay(address token, uint256 principal, uint256 rate, uint256 time) external {
    (uint256 interest, uint256 fees) = calculateInterest(principal, rate, time);
    IERC20(token).transferFrom(msg.sender, feeReceiver, fees);
}
This function unconditionally attempts to transfer fees, even when they amount to zero. While this works fine with many ERC20 implementations, it fails with tokens that explicitly disallow zero-value transfers.
Implementing the Fix
To resolve this issue, we need to add a check before attempting the fee transfer:
function repay(address token, uint256 principal, uint256 rate, uint256 time) external {
    (uint256 interest, uint256 fees) = calculateInterest(principal, rate, time);
    if (fees > 0) {
        IERC20(token).transferFrom(msg.sender, feeReceiver, fees);
    }
}
This simple check ensures that we only attempt to transfer fees when they are non-zero, thereby avoiding potential reverts with certain ERC20 implementations.
Tuning the fuzz tests:
You can notice the test uses multiple vm.assume() cheatcodes. It is a feature provided by foundry to constrain inputs to realistic ranges.
- Prevents overflow: By limiting
amountto 1e36 (1 billion ETH), we avoid overflow in most cases. - Realistic scenarios: The bounds ensure we're testing with values that could occur in the real world.
- Focused testing: We ensure we're testing the full range of relevant inputs, including edge cases.
- Efficiency: Every test run uses meaningful inputs, making better use of the testing time.
When we don't properly tune inputs for fuzz testing, false positives become more likely, as tests might often fail due to unrelated issues like overflows rather than the actual bug we're looking for. Important bugs can be missed if edge cases, such as small values or unusual rates, aren't adequately covered. Also untuned fuzz tests often waste CPU resources on unrealistic scenarios, making the process inefficient.
In conclusion, tuning inputs in fuzz testing is crucial for:
- Ensuring realistic and meaningful test scenarios
- Efficiently covering the input space, including edge cases
- Avoiding false positives due to overflow or other irrelevant issues
- Making the best use of limited testing resources
By carefully constraining our inputs using bound or assume, we can create more effective fuzz tests that are better at catching subtle bugs while avoiding wasted cycles on unrealistic scenarios.
The above example illustrates the value of adding fuzz testing in the test suite. While the unit test gave us a false sense of security, the fuzz test uncovered a subtle yet important bug that was hiding in the plain sight.
[!TIP] Key Takeaways :
- Uncovering edge cases: By exploring a wide range of inputs, fuzz tests can reveal issues that occur only under specific, often unexpected conditions.
- Improving code robustness: Addressing issues found by fuzz tests often leads to more resilient and flexible code.
- Complementing unit tests: While unit tests verify specific scenarios, fuzz tests provide a broader coverage of possible inputs and states.
- Tuning: The fuzz tests are more likely to catch the edge cases when the parameter ranges are tuned properly.
As smart contract developers, we must embrace fuzz testing as an integral part of our testing strategy. It serves as a powerful tool to enhance the security and reliability of our contracts.
Useful resources:
Advanced Testing
In the previous chapters we have looked into the basic tests that every project has to implement to build a stronger test suite. Once those tests are implemented, it's time to move on to advanced testing which helps to further boost the confidence before going live. Advanced tests help make sure your contracts are really strong and can handle more complicated situations. These tests look deeper into how your contracts work together, handle different scenarios, and stay reliable. By using advanced testing methods, you can find hidden problems that the basic tests might have missed.
However, it's important to plan these advanced tests carefully. Implementing them can take a lot of time, especially depending on your project's timeline and resources. Finding the right balance between testing and development is crucial. Not every advanced test type is necessary for every project. Depending on what your project focuses on, some tests will be more important than others. So its crucial to set the right priorities.
For example:
- End-to-End (E2E) Tests can be crucial for bridge/layer-2 protocols because they ensure that all parts of the system work together seamlessly.
- Invariant Tests can be especially important for DeFi protocols.
- Differential Tests could be more useful for math-heavy projects where precise calculations are essential.
Types:
-
Invariant Tests: These tests helps ensure that certain important rules always stay true no matter what happens in your system. For example, making sure that the total supply of tokens never changes unexpectedly.
-
Differential Tests: Differential testing cross-references multiple implementations of the same function by comparing each one’s output.
-
Lifecycle Tests: These tests follow your contracts through all their stages, from when they are first created to when they are updated or closed. They make sure everything works as expected at each step.
-
Scenario Tests: Scenario testing uses real-life situations to see how your contracts handle them. By simulating what might happen in the real world, we can ensure the system behaves as expected.
-
End-to-End (E2E) Tests: As the name suggests, the E2E tests check the whole system end to end. They make sure all components of the system work together correctly, giving the confidence that everything functions as it should when everything is connected.
-
Mutation Tests: Mutation testing makes small changes to the contracts on purpose to see if our tests can catch them. This helps you check if our tests are strong enough to find mistakes.
Each of these advanced tests adds another layer of protection, helping to catch issues that basic tests might have missed. Although using these advanced testing methods can be powerful and add those additional points before audit, we should be aware that these tests should come only after the basic tests are implemented properly for the system with atleast 95% coverage.
Note: While this guide uses Foundry to show advanced testing methods, you can use these techniques with other testing tools too.
Remember: Not all advanced tests are needed for every project. Choose the ones that best fit your project's goals and complexity. Planning your testing strategy wisely will help you use your time and resources effectively, ensuring that your contracts are both robust without affecting the time to market.
Invariant Testing
We just saw what fuzz tests are and how it can be useful. We mentioned that fuzz tests are "stateless", which means that it can test function in isolation. Invariant tests, on the other hand, are "stateful". It aims to verify that the entire system behaves correctly under specified conditions and properties that are supposed to always hold true. It ensures that the state of the contract remains consistent and aligned with its expected properties, irrespective of the sequence of operations performed. An invariant is something that must always be true about the system, no matter how it is used. For example, the sum of all token balances in a liquidity pool might always need to equal the pool’s reserves.
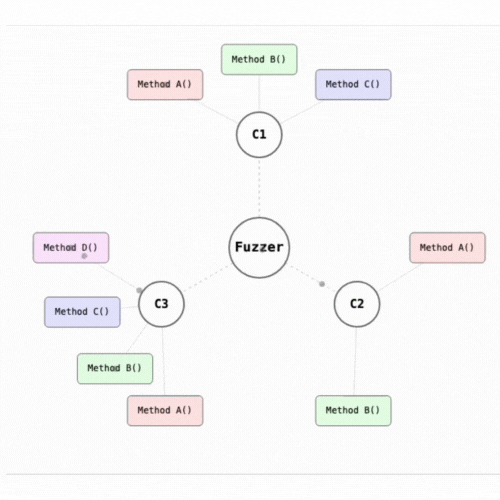
Invariant tests are not limited to testing isolated contract methods but rather observes how different functions interact with each other over time, ensuring that the core requirements of the protocol are respected under all circumstances. It’s particularly powerful in the context of DeFi protocols, where interactions between different methods and contracts must consistently respect system-wide invariants.
Fuzzing vs. Invariant Testing
While both fuzzing and invariant testing are valuable tools in a developer's arsenal, they serve different purposes and have distinct characteristics:
Fuzzing
Fuzzing is a targeted approach to testing individual functions or methods:
- It focuses on a specific method of a contract, calling it multiple times with randomized inputs.
- The goal is to find edge cases or unexpected behaviors within a single function.
- Fuzzing is more "surgical" in nature, diving deep into the behavior of individual components.
Example of a fuzz test:
function testFuzz_Deposit(uint256 amount) public {
    vm.assume(amount > 0 && amount <= token.balanceOf(user));
    vm.prank(user);
    pool.deposit(amount);
    assertEq(pool.balanceOf(user), amount);
}
Invariant Testing
Invariant testing, on the other hand, takes a holistic approach:
- It verifies that certain properties (invariants) of the system remain true under all possible sequences of operations.
- Invariant tests can call multiple functions in random order with random inputs.
- The focus is on maintaining system-wide consistency rather than the behavior of individual functions.
Example of an invariant:
function invariant_totalSupplyEqualsSumOfBalances() public {
    uint256 totalSupply = token.totalSupply();
    uint256 sumOfBalances = 0;
    for (uint256 i = 0; i < users.length; i++) {
        sumOfBalances += token.balanceOf(users[i]);
    }
    assertEq(totalSupply, sumOfBalances);
}
Types of Invariant Testing
Open Invariant Testing
Open invariant testing is the unrestricted form of invariant testing:
- All public and external functions of the contract under test are exposed to the fuzzer.
- The fuzzer can call any function with any arguments in any order.
- This approach can find complex bugs that arise from unexpected interactions between different parts of the system.
- However, it may also generate many unrealistic scenarios that wouldn't occur in real scenarios.
Example setup:
contract OpenInvariantTest is Test {
    LendingPool pool;

    function setUp() public {
        pool = new LendingPool();
        targetContract(address(pool));
    }

    function invariant_totalBorrowsLessThanTotalDeposits() public {
        assert(pool.totalBorrows() <= pool.totalDeposits());
    }
}
Constrained Invariant Testing
Constrained invariant testing uses the handler pattern to restrict the fuzzer's actions:
- Custom handler contracts define a set of actions that the fuzzer can perform.
- This allows for more realistic test scenarios that better reflect actual usage patterns.
- Handlers can incorporate preconditions and bounds on inputs to prevent unrealistic states.
- While more constrained, this approach can still uncover subtle bugs that might be missed by more targeted tests.
Example of a handler for constrained invariant testing:
contract LendingPoolHandler {
    LendingPool pool;
    address[10] users;

    constructor(LendingPool _pool, address[10] memory _users) {
        pool = _pool;
        users = _users;
    }

    function deposit(uint256 amount, uint256 userIndex) public {
        amount = bound(amount, 1, 1000 ether);
		userIndex = bound(userIndex, 1, 10);
        address user = users[userIndex];
        pool.deposit{value: amount}(user);
    }

    function borrow(uint256 amount, uint256 userIndex) public {
        amount = bound(amount, 1, 100 ether);
        userIndex = bound(userIndex, 1, 10);
        address user = users[userIndex];
        pool.borrow(amount, user);
    }
}
In the above contract you can notice that the handler is exposed to the fuzzer rather than the contract under test. This gives us more precise control over the tests. The handlers can also implement bounds if necessary but its not mandatory. Usually its better to start with bounded tests then slowly transition towards unbounded tests depending on the requirements.
Example:
Okay, now let's look into a practical example where invariant tests can be useful.
We have a simple lending protocol implemented in Solidity below:
contract LendingProtocol {
    mapping(address => uint256) public deposits;
    mapping(address => uint256) public borrows;
    IERC20 public token;
    uint256 public constant COLLATERAL_FACTOR = 80; // 80% collateral factor
    uint256 public totalDeposits;
    uint256 public totalBorrows;

    constructor(address _token) {
        token = IERC20(_token);
    }

    function deposit(uint256 amount) external {
        require(token.transferFrom(msg.sender, address(this), amount), "Transfer failed");
        deposits[msg.sender] += amount;
        totalDeposits += amount;
    }

    function borrow(uint256 amount) external {
        uint256 maxBorrow = (deposits[msg.sender] * COLLATERAL_FACTOR) / 100;
        require(borrows[msg.sender] + amount <= maxBorrow, "Exceeds borrow limit");
        borrows[msg.sender] += amount;
        totalBorrows += amount;
        require(token.transfer(msg.sender, amount), "Transfer failed");
    }

    function repay(uint256 amount) external {
        require(token.transferFrom(msg.sender, address(this), amount), "Transfer failed");
        uint256 actualRepayment = amount > borrows[msg.sender] ? borrows[msg.sender] : amount;
        borrows[msg.sender] -= actualRepayment;
        totalBorrows -= actualRepayment;
        if (amount > actualRepayment) {
            uint256 excess = amount - actualRepayment;
            deposits[msg.sender] += excess;
            totalDeposits += excess;
        }
    }

    function withdraw(uint256 amount) external {
        require(deposits[msg.sender] > 0, "No deposits");
        uint256 requiredCollateral = (borrows[msg.sender] * 100) / COLLATERAL_FACTOR;
        require(deposits[msg.sender] >= requiredCollateral, "insufficient collateral");

        uint256 availableToWithdraw = deposits[msg.sender] - requiredCollateral;
        uint256 actualWithdrawal = amount > availableToWithdraw ? availableToWithdraw : amount;

        require(actualWithdrawal > 0, "insufficient funds");

        deposits[msg.sender] -= actualWithdrawal;
        totalDeposits -= actualWithdrawal;
        require(token.transfer(msg.sender, actualWithdrawal), "Transfer failed");
    }
}
The above contract allows users to deposit ERC20 tokens and borrow against their deposits. Key features include:
- Deposits: Users can deposit tokens, increasing their balance in the protocol.
- Borrowing: Users can borrow up to 80% (
COLLATERAL_FACTOR) of their deposited amount. - Repayment: Users can repay their loans, reducing their borrow balance.
- Withdrawal: Users can withdraw their deposits, but only if it doesn't leave them undercollateralized.
Defining Invariants
To ensure the protocol functions correctly, we define the following invariants:
- User Collateral Always Sufficient: A user's deposit should always cover their borrow according to the collateral factor.
- Total Deposits Greater Than Total Borrows: The total amount deposited in the protocol should always be greater than or equal to the total amount borrowed.
Here's the invariant test contract:
contract LendingProtocolInvariantTest is Test {
    LendingProtocol public protocol;
    MockERC20 public token;
    Handler public handler;

    function setUp() public {
        token = new MockERC20("Test Token", "TEST");
        protocol = new LendingProtocol(address(token));
        handler = new Handler(address(protocol), address(token));
        targetContract(address(handler));
    }

    function invariant_userCollateralAlwaysSufficient() public {
        address[] memory users = handler.getUserList();
        for (uint256 i = 0; i < users.length; i++) {
            address user = users[i];
            uint256 userDeposit = protocol.deposits(user);
            uint256 userBorrow = protocol.borrows(user);

            // If user has any borrows, they must maintain sufficient collateral
            if (userBorrow > 0) {
                uint256 requiredDeposit = (userBorrow * 100) / protocol.COLLATERAL_FACTOR();
                assertGe(
                    userDeposit,
                    requiredDeposit,
                    "INVARIANT_INSUFFICIENT_COLLATERAL"
                );
            }
        }
    }

    function invariant_totalDepositsGreaterThanBorrows() public {
        assertGe(
            protocol.totalDeposits(),
            protocol.totalBorrows(),
            "INVARIANT_DEPOSITS_GT_BORROW"
        );
    }
}
In the setup() function you can see that we use the targetContract() cheatcode to inform the fuzzer to only call the functions defined in the handler contract. If not, then all the contract created in the setup function will be fuzzed which will lead to waste of resources. Similarly you can also use the excludeContract() cheatcode according to your usecase.
Handler Contract and Actors
As explained earlier, using handler contract is useful in simulating the real world scenario of the users would interact with the contracts. In this case, users should deposit first before borrowing or withdrawing. Similarly, users should first borrow before trying to repay to make sure the tests mimick real world behaviour in the tests. Actors are the different addresses that interact with the system.
Foundry generates different address for each run during the invariant test. To make sure it's utilized in the tests, we should prank the calls with
msg.senderin the tests.
contract Handler is Test {
    SimpleLendingProtocol public protocol;
    MockERC20 public token;
    mapping(address => bool) public actors;
    address[] public actorList;

    constructor(address _protocol, address _token) {
        protocol = LendingProtocol(_protocol);
        token = MockERC20(_token);
    }

    function deposit(uint256 amount) public {
        amount = bound(amount, 1, 10e20);
        token.mint(msg.sender, amount);
        vm.startPrank(msg.sender);
        token.approve(address(protocol), type(uint256).max);
        protocol.deposit(amount);
        vm.stopPrank();

        if (!actorList[msg.sender]) {
            actorList[msg.sender] = true;
            actors.push(msg.sender);
        }
    }

    function borrow(uint256 amount) public {
        address actor = msg.sender;
        uint256 maxBorrow = (protocol.deposits(actor) * protocol.COLLATERAL_FACTOR()) / 100;
        if (maxBorrow == 0) return;

        amount = bound(amount, 1, maxBorrow);
        vm.startPrank(actor);
        try protocol.borrow(amount) {
            // Borrow succeeded
        } catch {
            // Ignore failed borrows
        }
        vm.stopPrank();

        if (!actorList[actor]) {
            actorList[actor] = true;
            actors.push(actor);
        }
    }

    function withdraw(uint256 amount) public {
        address actor = msg.sender;
        uint256 currentDeposit = protocol.deposits(actor);
        if (currentDeposit == 0) return;

        amount = bound(amount, 1, currentDeposit);
        vm.prank(actor);
        protocol.withdraw(amount);

        if (!actors[actor]) {
            actors[actor] = true;
            actors.push(actor);
        }
    }

    function repay(uint256 amount) public {
        address actor = msg.sender;
        uint256 currentBorrow = protocol.borrows(actor);
        if (currentBorrow == 0) return;

        amount = bound(amount, 1, currentBorrow);
        token.mint(actor, amount);

        vm.startPrank(actor);
        token.approve(address(protocol), amount);
        protocol.repay(amount);
        vm.stopPrank();

        if (!actorList[actor]) {
            actorList[actor] = true;
            actors.push(actor);
        }
    }

    function getUserList() external view returns (address[] memory) {
        return userList;
    }
}
In the Handler contract, we maintain a list of users with the actors array and actorList mapping to track all the users who have interacted with the protocol. When a user performs an action (deposit, borrow, withdraw, repay), they are added to the list if they aren't already present. This allows the invariant tests to iterate over all users to verify that the invariants hold for every one.
This ensures that the system behaves as expected across multiple user interactions.
Based on our test setup, all the functions in the handler contract will be randomly called by the fuzzer. If you want to restrict the fuzzer to call specific functions you can do that as well. For example, if you want the fuzzer to ignore the repay() method, you can do so via the targetSelector() cheatcode.
bytes4[] memory selectors = new bytes4[](3);
selectors[0] = Handler.deposit.selector;
selectors[1] = Handler.withdraw.selector;
selectors[2] = Handler.borrow.selector;

targetSelector(FuzzSelector({
    addr: address(handler),
    selectors: selectors
}));
Running the Invariant Tests
Having defined the handlers and invariants, let's go ahead and run the invariant tests.
forge t --mc LendingProtocolInvariantTest -vv
We can see that the invariant test failed with the error : INVARIANT_INSUFFICIENT_COLLATERAL. This is critical as one of the core invariant has been violated.
[FAIL: <empty revert data>]
	 [Sequence]
        sender=0x00000000000000000000002eA38b54cE5a819AF6 addr=[test/invariant/Invariant.t.sol:Handler]0xF62849F9A0B5Bf2913b396098F7c7019b51A820a calldata=deposit(uint256) args=[268086407878502856564320633721989845494868808503440654 [2.68e53]]
        sender=0x00000000000000000000002eA38b54cE5a819AF6 addr=[test/invariant/Invariant.t.sol:Handler]0xF62849F9A0B5Bf2913b396098F7c7019b51A820a calldata=borrow(uint256) args=[1083181390655043523035 [1.083e21]
        sender=0x0000000000000000000000000000000000657374 addr=[test/invariant/Invariant.t.sol:Handler]0xF62849F9A0B5Bf2913b396098F7c7019b51A820a calldata=deposit(uint256) args=[149284093665934295474410336178711275202335643493951105 [1.492e53]]
        sender=0x00000000000000000000002eA38b54cE5a819AF6 addr=[test/invariant/Invariant.t.sol:Handler]0xF62849F9A0B5Bf2913b396098F7c7019b51A820a calldata=withdraw(uint256) args=[2442579456253310227425442841 [2.442e27]]
 invariant_userCollateralAlwaysSufficient() (runs: 1, calls: 1, reverts: 1)
Logs:
  Error: INVARIANT_INSUFFICIENT_COLLATERAL
  Error: a >= b not satisfied [uint]
    Value a: 262567983659900320649
    Value b: 508481869510300963140
The invariant test invariant_userCollateralAlwaysSufficient() is designed to ensure that each user's deposit always meets or exceeds the required collateral based on their borrow. The test runs multiple random sequences of user interactions to check this condition.
In this case, the test failed, indicating that the invariant was violated. You can also see that the failure output provides a sequence of function calls that led to the violation.
From the above output, here's the sequence that triggered the bug:
- Deposit: A user deposits an amount.
- Borrow: The same user borrows an amount within their allowed limit.
- Deposit: Another deposit is made (could be by the same or a different user).
- Withdraw: The initial user withdraws an amount.
Let's break down this sequence with some example values to better understand what the error is:
-
User Deposits 500 ETH
- Deposits: 500 ETH
- Borrows: 0 ETH
- Collateral Factor: 80%
- Max Borrow: (500 * 80%) = 400 ETH
-
User Borrows 400 ETH
- Deposits: 500 ETH
- Borrows: 400 ETH
- Required Collateral: (400 * 100) / 80 = 500 ETH
- Available to Withdraw: 500 - 500 = 0 ETH
-
User Deposits an Additional 100 ETH
- Deposits: 600 ETH
- Borrows: 400 ETH
- Required Collateral: (400 * 100) / 80 = 500 ETH
- Available to Withdraw: 600 - 500 = 100 ETH
-
User Withdraws 200 ETH
- Attempting to Withdraw: 200 ETH
- Available to Withdraw: 100 ETH
- Issue: The
withdrawfunction allows withdrawal without properly checking if it leaves the user undercollateralized. - After Withdrawal:
- Deposits: 600 - 200 = 400 ETH
- Borrows: 400 ETH
- Required Collateral: (400 * 100) / 80 = 500 ETH
- Actual Collateral: 400 ETH
- Collateral Deficit: 500 - 400 = 100 ETH
The user was able to withdraw more than the available amount, leaving their collateral insufficient to cover their borrow.
The invariant test detected that the user's deposit (a = 262567983659900320649) was less than the required collateral (b = 508481869510300963140). This violates the invariant that the user's deposit must always be greater than or equal to the required collateral.
Voila! The invariant tests helped us catch the bug in our code.
Fixing the Bug
Original withdraw Function
function withdraw(uint256 amount) external {
    require(deposits[msg.sender] > 0, "No deposits");
    uint256 actualWithdrawal = amount > deposits[msg.sender] ? deposits[msg.sender] : amount;
    deposits[msg.sender] -= actualWithdrawal;
    totalDeposits -= actualWithdrawal;
    require(token.transfer(msg.sender, actualWithdrawal), "Transfer failed");
}
The function does not check if the withdrawal would leave the user's collateral below the required level to secure their borrow.
Fixing the withdraw Function
To fix this, we need to modify the withdraw function to ensure users cannot withdraw collateral that would leave their loans undercollateralized.
function withdraw(uint256 amount) external {
    require(deposits[msg.sender] > 0, "No deposits");

    // Calculate the required collateral based on current borrows
    uint256 requiredCollateral = (borrows[msg.sender] * 100) / COLLATERAL_FACTOR;
    require(deposits[msg.sender] >= requiredCollateral, "insufficient collateral");

    // Calculate the maximum amount that can be withdrawn
    uint256 availableToWithdraw = deposits[msg.sender] - requiredCollateral;
    uint256 actualWithdrawal = amount > availableToWithdraw ? availableToWithdraw : amount;

    require(actualWithdrawal > 0, "insufficient funds");

    deposits[msg.sender] -= actualWithdrawal;
    totalDeposits -= actualWithdrawal;
    require(token.transfer(msg.sender, actualWithdrawal), "Transfer failed");
}
Before allowing a withdrawal, we calculate the requiredCollateral based on the user's current borrow. Then, we determine availableToWithdraw by subtracting requiredCollateral from the user's deposits. So that the user can only withdraw up to availableToWithdraw. This should ensure that the user maintains sufficient collateral after the withdrawal.
After applying the fix, we rerun the tests and get the following output:
Ran 2 tests for test/invariant/LendingInvariantTest.t.sol:LendingInvariantTest
[PASS] invariant_totalDepositsGreaterThanBorrows() (runs: 256, calls: 128000, reverts: 0)
[PASS] invariant_userCollateralAlwaysSufficient() (runs: 256, calls: 128000, reverts: 0)
Suite result: ok. 2 passed; 0 failed; 0 skipped; finished in 70.86s (86.28s CPU time)
The tests now pass with 0 reverts, confirming that the invariants hold and the bug has been fixed.
[!TIP] You can set the
show_metricsflag totruein your foundry config file to see the call metrics of your invariant tests.[PASS] invariant_totalDepositsGreaterThanBorrows() (runs: 256, calls: 128000, reverts: 0) | Contract | Selector | Calls | Reverts | Discards | |----------|----------|-------|---------|----------| | Handler | borrow | 25440 | 0 | 0 | | Handler | deposit | 25753 | 0 | 0 | | Handler | repay | 25653 | 0 | 0 | | Handler | withdraw | 25766 | 0 | 0 |You can see the no.of calls to each method in our Handler contract.
How the Invariant Test Helped Find the Bug
The invariant test was crucial in detecting the subtle bug in the withdraw function. Here's how it helped:
- Automated Detection: The invariant test automatically ran numerous sequences of user interactions, simulating real-world usage patterns.
- Sequence Reproduction: It provided the exact sequence of actions that led to the invariant violation, making it easier to reproduce and analyze the bug.
Final Thoughts
This example highlights the importance of invariant testing in smart contract development:
- Detecting Edge Cases: Invariant tests can uncover issues that may not be evident through standard unit tests, especially with extreme values or unusual sequences of actions.
- Ensuring Protocol Safety: By continuously checking critical conditions, invariant tests help ensure the protocol remains secure under all circumstances.
- Facilitating Debugging: Providing detailed logs and sequences aids developers in quickly pinpointing and fixing bugs.
By incorporating invariant testing into the development process, we enhance the robustness and reliability of smart contracts, making them safer for users.
Resources:
- https://mirror.xyz/horsefacts.eth/Jex2YVaO65dda6zEyfM_-DXlXhOWCAoSpOx5PLocYgw
- https://allthingsfuzzy.substack.com/p/creating-invariant-tests-for-an-amm
- https://book.getfoundry.sh/forge/invariant-testing#invariant-testing
Differential Testing
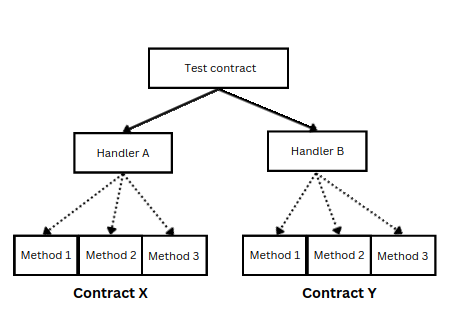
Differential testing is quite interesting. It's a testing technique where multiple implementations of the same specification are compared against each other. You can think of it as something similar to back-to-back testing or A/B testing from the web2 world. The key goal is to identify differences in behaviours under the same inputs to diagnose the defect in one or more implementations.
In differential testing:
- The implementation in addition to solidity implementation requires to have at least one more other implementation.
- The inputs which are fed to both the implementations are same.
- We compare the output or behavior to check for a difference.
- We would investigate whether the differences are caused by bugs or are acceptable.
Differential testing is particularly beneficial in some scenarios.
- Identifying edge cases for protocols that have a complex / math heavy logic.
- It serves as a form of cross-verification, increasing confidence in the correctness of the contract.
Example: Computing the Nth Fibonacci Number
To illustrate differential testing, let's consider a simple example of computing the nth Fibonacci number using Solidity and comparing the behaviour against the Rust implementation. By implementing the same algorithm in both languages and comparing the outputs for a range of inputs, we can validate the correctness of our implementations.
Solidity Implementation
// SPDX-License-Identifier: MIT
pragma solidity ^0.8.0;

contract Fibonacci {
    function fib(uint n) public pure returns (uint) {
        require(n >= 0, "Input must be non-negative");
        if (n == 0) return 0;
        uint a = 0;
        uint b = 1;
        for (uint i = 1; i < n; i++) {
            uint c = a + b;
            a = b;
            b = c;
        }
        return b;
    }
}
Rust Implementation
fn fib(n: u32) -> u32 {
    assert!(n >= 0, "Input must be non-negative");
    if n == 0 {
        return 0;
    }
    let mut a = 0;
    let mut b = 1;
    for _ in 1..n {
        let c = a + b;
        a = b;
        b = c;
    }
    b
}

fn main() {
    let result = fib(10);
    println!("The 10th Fibonacci number is {}", result);
}
To test this in Foundry, we can use the vm.ffi() cheatcode. It allows us to call external programs or scripts from within Solidity tests. This feature is quite useful in this case, as it enables us to run arbitrary command to implement advanced and complex testing patterns like this one.
The vm.ffi() cheatcode accepts an array of strings where:
- The first element is the path to the external program or script you want to execute.
- The subsequent elements are the arguments to pass to the program or script.
- The output of the command is returned as a
bytesobject, which can be decoded into the desired type (e.g.,uint,string).
You can find more details about the ffi cheatcode here.
Here’s an expanded example of a test file using FFI to compare the Fibonacci computation in Solidity and Rust:
// test/FibonacciTest.t.sol
pragma solidity ^0.8.24;

import "forge-std/Test.sol";
import "../contracts/Fibonacci.sol";

contract FibonacciTest is Test {
    Fibonacci private fibonacci;
    string private constant RUST_BINARY = "./target/release/fibonacci";

    // Define test cases with expected outputs
    struct TestCase {
        uint input;
        uint expectedOutput;
    }

    TestCase[] private testCases;

    /// @notice Sets up the contract before each test.
    function setUp() public {
        fibonacci = new Fibonacci();

        // Initialize test cases with known Fibonacci numbers
        testCases.push(TestCase(0, 0));
        testCases.push(TestCase(1, 1));
        testCases.push(TestCase(2, 1));
        testCases.push(TestCase(3, 2));
        testCases.push(TestCase(4, 3));
        testCases.push(TestCase(5, 5));
        testCases.push(TestCase(6, 8));
        testCases.push(TestCase(7, 13));
        testCases.push(TestCase(8, 21));
        testCases.push(TestCase(9, 34));
        testCases.push(TestCase(10, 55));
    }

    /// @notice Tests the Fibonacci implementation using predefined test cases
    function testFibonacciWithTestCases() public {
        for (uint i = 0; i < testCases.length; i++) {
            TestCase memory tc = testCases[i];

            // Test Solidity implementation
            uint solResult = fibonacci.fib(tc.input);
            assertEq(
                solResult,
                tc.expectedOutput,
                string.concat(
                    "Solidity implementation failed for input: ",
                    vm.toString(tc.input)
                )
            );

            // Test Rust implementation via FFI
            string[] memory inputs = new string[](2);
            inputs[0] = RUST_BINARY;
            inputs[1] = vm.toString(tc.input);

            bytes memory ffiResult = vm.ffi(inputs);
            uint rustResult = abi.decode(ffiResult, (uint));

            assertEq(
                rustResult,
                tc.expectedOutput,
                string.concat(
                    "Rust implementation failed for input: ",
                    vm.toString(tc.input)
                )
            );

            // Compare Solidity and Rust implementations
            assertEq(
                solResult,
                rustResult,
                string.concat(
                    "Mismatch between Solidity and Rust results for input: ",
                    vm.toString(tc.input)
                )
            );
        }
    }
}
If all outputs match, we gain confidence in the correctness of both implementations. If discrepancies occur, they may indicate a bug in one of the implementations or an issue with integer overflow, especially in languages or environments with different integer size limits.
The above is the simplest form of differential testing. In the fibonacci example, we limited ourself with the set of inputs and outputs which is not much effective. We can make it more effective by exposing the methods to the fuzzer to make sure the implementation is robust enough. This is where Differential Fuzzing comes into picture.
Differential Fuzz Testing
Differential fuzzing is a testing technique that involves executing different implementations of the same function or logic and comparing the results. This technique allows us to verify that the different implementations are equivalent and behave consistently, even when provided with unexpected, invalid, or random inputs. This is different from normal fuzzing which typically tests a single implementation by feeding it a wide range of inputs and monitoring for unexpected behavior, crashes, or security vulnerabilities.
For example here's a script from EnbangWu to test different widely used solidity math libraries In this project, in which they performed differential fuzzing on different fixed-point libraries (OpenZeppelin, Solmate, Solady and prb-math). they found broad compatibility among these libraries, with some differences in handling edge cases and gas efficiency.
function test_diffMulDivUp(uint256 x, uint256 y, uint256 z) public {
        if (y > 1) {
            x = x % ((type(uint256).max / y) + 1);
        }
        if (z > 0) { // assume that the divisor is not zero
        uint256 ozResult = instance.OzMulDivUp(x, y, z);
        uint256 soladyResult = instance.soladyMulDivUp(x, y, z);
        uint256 solmateResult = instance.solmateMulDivUp(x, y, z);
        require(
            ozResult == soladyResult && soladyResult == solmateResult
        );
    }
    }
    function test_diffMulWadUp(uint256 x, uint256 y) public {
        if (y > 1) {
            x = x % ((type(uint256).max / y) + 1);
        }
        uint256 solmateResult = instance.solmateMulWadUp(x, y);
        uint256 soladyResult = instance.soladyMulWadUp(x, y);
        require(
            solmateResult == soladyResult
        );
    }
It helps verify the correctness as well as gas efficiency of the libraries.
| Function Name | OpenZeppelin | Solady | Solmate | PRB-Math |
|---|---|---|---|---|
log2 | 677 | 546 | N/A | N/A |
log2Up | 796 | 638 | N/A | N/A |
mulDivDown | 674 | 504 | 500 | 581 |
mulDivUp | 809 | 507 | 526 | N/A |
sqrt | 1146 | 683 | 685 | 977 |
divWadUp | N/A | 500 | 525 | N/A |
mulWadUp | N/A | 519 | 525 | N/A |
Things to keep in mind:
- It is important that same datatypes are used across implementations to avoid discrepancies
- Keep in mind the boundary conditions and edge cases in your inputs.
- Keep an eye out for exceptions, not just the comparison of outputs but also any reverts or any other odd behavior.
- Testing using math heavy/complex functions this technique should be sufficient rather than testing all the methods.
Conclusion
Differential testing is quite a useful technique for enhancing the reliability and security of the math heavy logic. As it compares multiple implementations of the same functionality, we can easily spot bugs that might have gone unnoticed by basic tests. When combined with fuzz testing, this approach becomes even more robust, automatically exploring a wide range of inputs and conditions.
In the high-stakes environment of smart contracts, employing differential testing on top of other tests contributes significantly to building trustworthy and secure protocols. As our ecosystem continues to grow, integrating these testing practices will be crucial for developers aiming to deliver robust and reliable smart contracts.
References
- VRGDA Differential Testing by transmissions11
- Differential Fuzzing Report by Enbang Wu
- Verifying the correctness of Solidity Merkle Tree implementation
Lifecycle Tests
To re-iterate: smart contracts are unique software entities that, once deployed, often control significant financial assets and execute critical business logic autonomously. Unlike traditional software that can be patched or updated easily, smart contracts require careful verification of their entire operational lifespan. This chapter explores lifecycle testing, a comprehensive approach to ensuring smart contracts behave correctly throughout their existence.
[!INFO] I first discovered lifecycle tests for smart contracts from the maple-core-v2 repo. They have one of the best test suites out there. I became a fan of it since then.
Lifecycle tests are advanced from of end-to-end test which is designed to validate the behavior of a smart contract throughout its entire lifecycle. They ensure that the contract behaves correctly over time, especially as it moves through different states and handles a sequence of operations that might occur during its lifespan. The main goal is to verify that the contract maintains integrity and correctness throughout all possible state changes.
In smart contracts, this "life story" includes several critical phases:
- Deployment and initialization
- Configuration and setup
- Active operation period
- State transitions and upgrades
- Emergency scenarios
For example, consider a token vesting contract. Its lifecycle begins when deployed, progresses through initialization where beneficiaries and schedules are set, enters an active phase where tokens gradually vest, handles claims throughout its life, and eventually completes when all tokens are distributed. Each of these phases must be thoroughly tested to ensure the contract behaves correctly throughout its existence.
Why not unit/integration tests?
While unit tests focus on individual functions and integration tests verify component interactions, lifecycle tests examine the evolution of contract's state and behavior during every stage. Think of it this way:
- Unit Tests are like checking individual car parts - the engine, wheels, brakes - in isolation.
- Integration Tests verify these parts work together - the engine powers the wheels, brakes stop the car.
- Lifecycle Tests ensure the car performs correctly throughout its entire lifespan - from factory assembly to years of operation.
Common Contract Lifecycle Patterns
Smart contracts often follow predictable lifecycle patterns based on their purpose:
- Time-Based Progression: Contracts that mature or evolve based on time, like vesting schedules or escrow. These contracts transition through states based on temporal triggers.
- User-Driven Evolution: Contracts that progress based on user actions, like governance systems where proposal submission and voting drive state changes.
- Event-Triggered Changes: Contracts that respond to external events or oracle data, transitioning states based on market conditions or other triggers.
Example #1: Lending Contract
Here's a quick example for Event Triggered changes. Let's use our previously implemented advanced lending contract that allows users to deposit collateral, borrow against it, and repay loans with a newly added liquidate() method for this example since the contract's state changes based on user actions and market conditions (price changes).
contract LendingWithLiquidation is AdvancedLending {
  uint256 public constant LIQUIDATION_THRESHOLD = 850; // 85% of collateral value
  uint256 public constant LIQUIDATION_BONUS = 50; // 5% bonus for liquidators
  uint256 public price; // Price of the token in USD (18 decimal places)

  ...
  ...

  // basic health check and liquidation method
  function liquidate(address borrower, uint256 amount) external {
      uint256 borrowerDebt = borrows[borrower];
      if (borrowerDebt == 0) revert NoDebtToLiquidate();

      uint256 collateralValue = (deposits[borrower] * price * COLLATERAL_FACTOR) / 1000 / 1e18;
      if (borrowerDebt * 1000 <= collateralValue * LIQUIDATION_THRESHOLD) revert PositionNotLiquidatable();

      uint256 maxLiquidation = (borrowerDebt * LIQUIDATION_THRESHOLD) / 1000;
      uint256 actualLiquidation = amount > maxLiquidation ? maxLiquidation : amount;

      uint256 collateralToLiquidate = (actualLiquidation * 1e18 * 1000) / (price * COLLATERAL_FACTOR);
      uint256 liquidationBonus = (collateralToLiquidate * LIQUIDATION_BONUS) / 1000;
      uint256 totalCollateralToLiquidator = collateralToLiquidate + liquidationBonus;

      if (deposits[borrower] < totalCollateralToLiquidator) revert InsufficientCollateral();

      if (!token.transferFrom(msg.sender, address(this), actualLiquidation)) revert TransferFailed();

      borrows[borrower] -= actualLiquidation;
      totalBorrows -= actualLiquidation;
      deposits[borrower] -= totalCollateralToLiquidator;
      totalDeposits -= totalCollateralToLiquidator;

      if (!token.transfer(msg.sender, totalCollateralToLiquidator)) revert TransferFailed();
  }
}
Here's an example of how a lifecycle test for this contract might look using Foundry:
    function testLendingLifecycle() public {
      console.log("Step 1: User deposits tokens");
      vm.startPrank(user);
      token.approve(address(lending), 1000 ether);
      lending.deposit(1000 ether);
      vm.stopPrank();

      assertEq(lending.deposits(user), 1000 ether);
      assertEq(lending.totalDeposits(), 1000 ether);

      console.log("Step 2: User borrows against collateral");
      vm.prank(user);
      lending.borrow(700 ether);

      assertEq(lending.borrows(user), 700 ether);
      assertEq(lending.totalBorrows(), 700 ether);

      console.log("Step 3: Attempt to borrow more than allowed");
      vm.expectRevert("Exceeds borrow limit");
      vm.startPrank(user);
      lending.borrow(150 ether);
      vm.stopPrank();

      console.log("Step 4: Partial repayment");
      vm.startPrank(user);
      token.approve(address(lending), 200 ether);
      lending.repay(200 ether);
      vm.stopPrank();

      assertEq(lending.borrows(user), 500 ether);
      assertEq(lending.totalBorrows(), 500 ether);

      console.log("Step 5: Withdraw some funds");
      vm.prank(user);
      lending.withdraw(100 ether);

      assertEq(lending.deposits(user), 900 ether);
      assertEq(lending.totalDeposits(), 900 ether);

      console.log("Step 6: Set up for liquidation");
      vm.prank(user);
      lending.borrow(200 ether);

      assertEq(lending.borrows(user), 700 ether);

      console.log("Step 7: Price drop, making the position liquidatable");
      lending.setPrice(0.8 ether); // 20% price drop

      console.log("Step 8: Liquidator attempts to liquidate");
      uint256 liquidatorBalanceBefore = token.balanceOf(liquidator);
      vm.startPrank(liquidator);
      token.approve(address(lending), 300 ether);
      lending.liquidate(user, 300 ether);
      vm.stopPrank();
      uint256 liquidatorBalanceAfter = token.balanceOf(liquidator);

      assertLt(lending.borrows(user), 700 ether);
      assertLt(lending.deposits(user), 900 ether);
      assertGt(liquidatorBalanceAfter, liquidatorBalanceBefore);
      console.log("Liquidator balance before:", liquidatorBalanceBefore);
      console.log("Liquidator balance after:", liquidatorBalanceAfter);
      console.log(
          "Collateral received by liquidator:",
          liquidatorBalanceAfter - liquidatorBalanceBefore
      );

      console.log("Step 9: User repays remaining debt");
      uint256 remainingDebt = lending.borrows(user);
      vm.startPrank(user);
      token.approve(address(lending), remainingDebt);
      lending.repay(remainingDebt);
      vm.stopPrank();

      assertEq(lending.borrows(user), 0);

      console.log("Step 10: User withdraws remaining collateral");
      uint256 remainingDeposit = lending.deposits(user);
      vm.prank(user);
      lending.withdraw(remainingDeposit);

      assertEq(lending.deposits(user), 0);

      assertEq(lending.totalBorrows(), 0);
      assertEq(lending.totalDeposits(), 0);
      assertLt(token.balanceOf(user), INITIAL_BALANCE);
      assertGt(token.balanceOf(liquidator), INITIAL_BALANCE);
  }
Sample output:
  Step 1: User deposits tokens
  Step 2: User borrows against collateral
  Step 3: Attempt to borrow more than allowed
  Step 4: Partial repayment
  Step 5: Withdraw some funds
  Step 6: Set up for liquidation
  Step 7: Price drop, making the position liquidatable
  Step 8: Liquidator attempts to liquidate
  Liquidator balance before: 10000000000000000000000
  Liquidator balance after: 10192187500000000000000
  Collateral received by liquidator: 192187500000000000000
  Step 9: User repays remaining debt
  Step 10: User withdraws remaining collateral
As you can see the above test demonstrates a complete lifecycle of the lending flow from deposit till withdrawal including the liquidation.
- The user puts some money in (deposits).
- Borrows some money.
- Then tries to borrow too much and get told "no".
- He pays back some of what he borrowed.
- He takes out a bit of what was originally put in.
- Again borrow some more.
- The value of the collateral drops (market crash).
- Liquidator comes in and liquidates part of his position.
- The user pays off the rest of what they owe.
- They take out whatever they have left and leave.
At each step, we're checking that everything works as it should. It's like making sure all the gears in a machine are turning correctly as we put it through its paces.
This test is quite effective because it doesn't just check one thing at a time. Instead, it looks at how everything works together, just like it would in the real world. It helps us catch problems that might only show up after a bunch of different things happen one after another. This lifecycle test demonstrates how the contract's state changes in response to various user actions (events), and how these changes affect subsequent actions. It's crucial to test these event-triggered changes comprehensively to ensure the contract behaves correctly throughout its entire lifecycle.
Let's look into another detailed example for time-based progression 👇
Example #2: Token Vesting Contract
Let's take an example of a vesting contract (time-based progression) and see how to implement lifecycle tests for the same.
The token vesting contract manages the gradual release of tokens to beneficiaries over time.
Let's examine its core requirements and states:
States:
- Uninitialized: Contract deployed but not configured
- Initialized: Beneficiary and schedule set
- Funded: Tokens deposited and ready
- Vesting: Active vesting period
- Completed: All tokens distributed
Let's implement the contract:
contract Vesting is Ownable {

    // Core storage variables
    IERC20 public token;
    address public beneficiary;
    uint256 public vestingStart;
    uint256 public vestingDuration;
    uint256 public totalAmount;
    uint256 public releasedAmount;
    VestingState public state;
    bool public paused;

     enum VestingState {
        Uninitialized,
        Initialized,
        Funded,
        Vesting,
        Completed
    }

    // Modifiers for common state checks
    modifier onlyInState(VestingState requiredState) {
        if (state != requiredState) {
            revert InvalidState(state, requiredState);
        }
        _;
    }

    function initialize(
        address _beneficiary,
        uint256 _vestingDuration
    ) external onlyOwner onlyInState(VestingState.Uninitialized) {
        // Validate input parameters
        if (_beneficiary == address(0)) {
            revert ZeroAddress();
        }
        if (_vestingDuration == 0) {
            revert ZeroDuration();
        }

        beneficiary = _beneficiary;
        vestingDuration = _vestingDuration;
        state = VestingState.Initialized;

        emit VestingInitialized(_beneficiary, _vestingDuration);
    }

    function fund(
        IERC20 _token,
        uint256 _amount
    ) external onlyOwner onlyInState(VestingState.Initialized) {
        if (_amount == 0) {
            revert ZeroAmount();
        }

        token = _token;
        totalAmount = _amount;

        // Attempt token transfer
        bool success = token.transferFrom(msg.sender, address(this), _amount);
        if (!success) {
            revert TransferFailed();
        }

        state = VestingState.Funded;
        emit VestingFunded(_amount);
    }

    function startVesting()
        external
        onlyOwner
        onlyInState(VestingState.Funded)
    {
        vestingStart = block.timestamp;
        state = VestingState.Vesting;
    }

    function vestedAmount() public view returns (uint256) {
        if (state != VestingState.Vesting) {
            return 0;
        }

        if (block.timestamp >= vestingStart + vestingDuration) {
            return totalAmount;
        }

        return (totalAmount * (block.timestamp - vestingStart)) / vestingDuration;
    }

    function claim() external whenNotPaused onlyBeneficiary {
        if (state != VestingState.Vesting) {
            revert InvalidState(state, VestingState.Vesting);
        }

        if (block.timestamp <= vestingStart) {
            revert VestingNotStarted();
        }

        uint256 vested = vestedAmount();
        uint256 claimable = vested - releasedAmount;

        if (claimable == 0) {
            revert NoTokensAvailable();
        }

        releasedAmount += claimable;
        bool success = token.transfer(beneficiary, claimable);
        if (!success) {
            revert TransferFailed();
        }

        emit TokensReleased(claimable);

        // Check if vesting is complete
        if (releasedAmount == totalAmount) {
            state = VestingState.Completed;
            emit VestingCompleted();
        }
    }
...
}
Now let's implement the lifecycle tests for the Vesting contract. We'll make sure that the test calls all the methods:
  function testVestingLifecycle() public {
        // Step 1: Verify initial state after deployment
        assertEq(uint256(vesting.state()), uint256(Vesting.VestingState.Uninitialized));
        assertEq(vesting.owner(), admin);
        assertEq(address(vesting.token()), address(0));

        // Step 2: Initialize the vesting contract
        vm.startPrank(admin);
        vesting.initialize(beneficiary, VESTING_DURATION);
        vm.stopPrank();

        assertEq(vesting.beneficiary(), beneficiary);
        assertEq(vesting.vestingDuration(), VESTING_DURATION);
        assertEq(uint256(vesting.state()), uint256(Vesting.VestingState.Initialized));

        // Step 3: Fund the vesting contract
        vm.startPrank(admin);
        token.approve(address(vesting), TOTAL_AMOUNT);
        vesting.fund(token, TOTAL_AMOUNT);
        vm.stopPrank();

        assertEq(token.balanceOf(address(vesting)), TOTAL_AMOUNT);
        assertEq(uint256(vesting.state()), uint256(Vesting.VestingState.Funded));

        // Step 4: Start vesting period
        vm.prank(admin);
        vesting.startVesting();

        assertEq(uint256(vesting.state()), uint256(Vesting.VestingState.Vesting));
        assertEq(vesting.vestingStart(), block.timestamp);

        // Step 5: Test partial vesting at 25% duration
        vm.warp(block.timestamp + VESTING_DURATION / 4);

        uint256 expectedVested = TOTAL_AMOUNT / 4;  // 25% should be vested
        assertApproxEqRel(vesting.vestedAmount(), expectedVested, 0.01e18);  // 1% tolerance

        // Step 6: Make partial claim
        uint256 preClaimBalance = token.balanceOf(beneficiary);

        vm.prank(beneficiary);
        vesting.claim();

        uint256 claimedAmount = token.balanceOf(beneficiary) - preClaimBalance;
        assertApproxEqRel(claimedAmount, expectedVested, 0.01e18);

        // Step 7: Test full vesting completion
        vm.warp(block.timestamp + VESTING_DURATION);  // Move to end of vesting

        assertEq(vesting.vestedAmount(), TOTAL_AMOUNT);  // All tokens should be vested

        // Step 8: Final claim
        vm.prank(beneficiary);
        vesting.claim();

        assertEq(uint256(vesting.state()), uint256(Vesting.VestingState.Completed));
        assertEq(token.balanceOf(beneficiary), TOTAL_AMOUNT);
        assertEq(token.balanceOf(address(vesting)), 0);

        // Step 9: Verify post-completion state
        vm.expectRevert(abi.encodeWithSelector(Vesting.InvalidState.selector,4,3));
        vm.prank(beneficiary);
        vesting.claim();
    }
We can also verify how the contract works under emergency situations with admin intervention:
    function testEmergencyControls() public {
        // Setup funded and vesting state
        vm.startPrank(admin);
        vesting.initialize(beneficiary, VESTING_DURATION);
        token.approve(address(vesting), TOTAL_AMOUNT);
        vesting.fund(token, TOTAL_AMOUNT);
        vesting.startVesting();
        vm.stopPrank();

        // Move to 25% vested
        vm.warp(block.timestamp + VESTING_DURATION / 4);

        // Test pause functionality
        vm.prank(admin);
        vesting.pause();

        // Verify claims are blocked
        vm.expectRevert(Vesting.ContractPaused.selector);
        vm.prank(beneficiary);
        vesting.claim();

        // Test unpause and claim
        vm.prank(admin);
        vesting.unpause();

        vm.prank(beneficiary);
        vesting.claim();

        // Verify tokens were claimed
        assertGt(token.balanceOf(beneficiary), 0);
    }
Awesome, this approach ensures our vesting contract behaves correctly throughout its entire lifecycle, handling both expected operations and emergency conditions appropriately. Now let's take a quick peek into some best practices I think would be useful when implementing the lifecycle tests.
Best practices and Common Pitfalls
Test complexity often grows exponentially with contract complexity, so it's good to structure them efficiently
contract ComplexLifecycleTest is Test {
    // Break down complex scenarios into smaller, focused tests
    function test_VestingSchedule_LinearVesting() public {
        // Test basic linear vesting
    }

    function test_VestingSchedule_WithCliff() public {
        // Test vesting with cliff period
    }

    // Use modifiers to enforce test prerequisites
    modifier withFundedContract() {
        _setupFundedState();
        _;
    }

    // Parameterize tests for different scenarios
    function test_VestingCalculation(uint256 timeElapsed) public {
        vm.assume(timeElapsed <= vestingDuration);
        // Test calculation with different time periods
    }
}
Manipulating time is crucial in lifecycle tests.
contract TimeAwareLifecycleTest is Test {
    // Define time constants clearly
    uint256 constant DAY = 1 days;
    uint256 constant YEAR = 365 days;

    function test_TimeProgression() public {
        // Start from a known timestamp
        vm.warp(1672531200); // Jan 1, 2023

        // Use relative time movements
        vm.warp(block.timestamp + 180 days);

        // Check time-sensitive calculations
        assertEq(
            vesting.vestedAmount(),
            expectedAmount,
            "Incorrect vesting calculation"
        );
    }

    // Test time boundaries
    function test_TimeBoundaries() public {
        // Test at exact boundaries
        vm.warp(vestingStart);
        vm.warp(vestingStart + vestingDuration - 1);
        vm.warp(vestingStart + vestingDuration);
    }
}
Proper state verification is essential for catching subtle bugs:
contract StateVerificationTest is Test {
    // Create a struct for expected state
    struct VestingState {
        uint256 releasedAmount;
        uint256 vestingStage;
        bool isActive;
    }

    function verifyState(VestingState memory expected) internal {
        // Comprehensive state verification
        assertEq(
            vesting.releasedAmount(),
            expected.releasedAmount,
            "Released amount mismatch"
        );
        assertEq(
            uint256(vesting.currentStage()),
            expected.vestingStage,
            "Stage mismatch"
        );
        assertEq(
            vesting.isActive(),
            expected.isActive,
            "Active status mismatch"
        );

        // Verify invariants
        _verifyInvariants();
    }

    function _verifyInvariants() internal {
        // Check fundamental truths that should always hold
        assert(vesting.releasedAmount() <= vesting.totalAmount());
    }
}
Tests serve as living documentation. Don't be shy to over-document your tests.
/// @title Token Vesting Lifecycle Tests
/// @notice Comprehensive tests for token vesting lifecycle
/// @dev These tests verify the complete contract lifecycle
contract TokenVestingLifecycleTest is Test {

    /// @dev This test progresses through all contract phases
    function test_DetailedLifecycle() public {
        // PHASE 1: Initialization
        /* Detailed explanation of what's being tested and why */

        // PHASE 2: Funding
        /* Clear documentation of test progression */

        // Clearly document assumptions
        // Document edge cases and why they matter
    }
}
- Time-Related Issues:
// WRONG: Hardcoded timestamps
vm.warp(1672531200);

// RIGHT: Relative time manipulation
vm.warp(block.timestamp + YEAR);
- State Pollution:
// WRONG: Relying on state from previous tests
function test_Second() public {
    // Assumes state from test_First
}

// RIGHT: Each test sets up its own state
function test_Second() public {
    _setupRequiredState();
    // Test logic
}
- Incomplete State Verification:
// WRONG: Partial verification
function test_Claim() public {
    vesting.claim();
    assertEq(token.balanceOf(beneficiary), amount);
}

// RIGHT: Complete state verification
function test_Claim() public {
    vesting.claim();
    verifyState(ExpectedState({
        releasedAmount: amount,
        vestingStage: ACTIVE,
        isActive: true
    }));
}
Cool, that's all you have to know to get an essence of what lifecycle testing is and how to implement it.
Throughout this chapter, we've explored the how to implement lifecycle testing for your protocol. Hopefully you've learned that unit tests verify individual components and integration tests check interactions, lifecycle tests validate the user's and contract's state at every phase. These tests serve as both a safety net and a form of living documentation, helping future developers understand how the contract should evolve over time.
Give yourself a pat on your back if you made it this far 👏👏.
I know that's a lot. I recommend you to re-read the chapter at your own pace to get the most out of it. As mentioned earlier, these advanced tests like differential testing, lifecycle tests, etc., are not mandatory to be implemented, but incorporating them will make your auditing very efficient as you'll find most of the bugs hiding in the plain sight.
It'll leave the auditors to go deep-in and butcher your code to search for intricate bugs. So it's that additional 1% of the effort that makes quite a big the difference in the securing your codebase. Also, you don't have to implement these tests from day 1. You can always improve your test suite by adding advanced tests post deployment as well. As your protocol accrues more TVL, it gives you a piece of mind and helps you sleep better at nights* 😅.
Don't go yet, there are more interesting testing patterns like scenario testing, mutation testing are waiting for you. After that we'll also explore formal verification, symbolic testing, branching tree technique and more! See you there 👋
Scenario Tests
In our previous chapter, we explored lifecycle testing which examines a contract's behavior from start to finish. Now, let's dive into scenario testing, a closely-related but slightly-distinct approach that allows us to validate specific situations and edge cases that might occur during a contract's operation.
Wut?
Scenario testing is a testing methodology that focuses on validating how a smart contract behaves in specific situations or "scenarios" that could occur during its operation. Unlike lifecycle tests that follow a linear path from deployment to completion, scenario tests explore different branches of possibility – think of them as "what if" situations that your contract might encounter.
To understand the difference, consider this analogy: If a lifecycle test is like following a character's journey from beginning to end in a book, scenario testing is like exploring all the different paths that character could have taken at each decision point. Each scenario represents a different "story" that could unfold based on different conditions and user actions.
As always its essential that you find that 95% of the bugs in your code with as much testing methods as you can so that you can leave that hidden 5% of the bugs for the auditors.
Why Scenario Testing Matters
As you know, smart contracts often operate in environments where multiple users or other contracts can interact with them in various ways, market conditions can change rapidly, and different combinations of events can occur. Scenario testing helps us:
- Validate contract behavior in specific situations that might be rare but critical
- Ensure the contract handles edge cases correctly
- Verify that different combinations of actions produce expected results
- Test complex interactions between multiple users or contracts that are not possible in other forms of testing
Let's explore this with our lending contract example from the previous chapter, but this time we'll create multiple scenarios that could occur during its operation.
Example: Lending Contract
Building on our previous lending contract, let's create scenario tests that explore different situations it might encounter:
contract LendingScenarioTest is Test {
    LendingWithLiquidation public lending;
    MockERC20 public token;
    address public user1;
    address public user2;
    address public liquidator;

    function setUp() public {
        token = new MockERC20("Mock Token", "MTK");
        lending = new LendingWithLiquidation(address(token));
        user1 = address(0x1);
        user2 = address(0x2);
        liquidator = address(0x3);

        // Initial setup for all users
        token.mint(user1, 1000 ether);
        token.mint(user2, 1000 ether);
        token.mint(liquidator, 1000 ether);
    }

    function test_Scenario_MultipleUsersCompetingForLiquidity() public {
        // Scenario: Two users deposit and try to borrow when there's limited liquidity

        // User1 deposits
        vm.startPrank(user1);
        token.approve(address(lending), 500 ether);
        lending.deposit(500 ether);
        vm.stopPrank();

        // User2 deposits
        vm.startPrank(user2);
        token.approve(address(lending), 300 ether);
        lending.deposit(300 ether);
        vm.stopPrank();

        // User1 borrows first
        vm.prank(user1);
        lending.borrow(400 ether);

        // User2 attempts to borrow
        vm.startPrank(user2);
        lending.borrow(240 ether);  // Should succeed (80% of 300)

        // Try to borrow more - should fail
        vm.expectRevert("Exceeds borrow limit");
        lending.borrow(1 ether);
        vm.stopPrank();

        assertEq(lending.borrows(user1), 400 ether);
        assertEq(lending.borrows(user2), 240 ether);
    }

    function test_Scenario_CascadingLiquidations() public {
        // Scenario: Multiple positions become liquidatable due to rapid price decline

        // Setup initial positions
        vm.startPrank(user1);
        token.approve(address(lending), 500 ether);
        lending.deposit(500 ether);
        lending.borrow(350 ether);  // 70% utilization
        vm.stopPrank();

        vm.startPrank(user2);
        token.approve(address(lending), 300 ether);
        lending.deposit(300 ether);
        lending.borrow(210 ether);  // 70% utilization
        vm.stopPrank();

        // Simulate market crash
        lending.setPrice(0.7 ether);  // 30% price drop

        // Liquidator starts liquidating positions
        vm.startPrank(liquidator);
        token.approve(address(lending), 1000 ether);

        uint256 liquidatorInitialBalance = token.balanceOf(liquidator);

        lending.liquidate(user1, 100 ether);
        lending.liquidate(user2, 60 ether);
        vm.stopPrank();

        // Verify liquidations
        assertLt(lending.borrows(user1), 350 ether);
        assertLt(lending.borrows(user2), 210 ether);
        assertGt(token.balanceOf(liquidator), liquidatorInitialBalance);
    }

    function test_Scenario_RepayDuringLiquidation() public {
        // Scenario: User attempts to repay while being liquidated

        // Setup user's position
        vm.startPrank(user1);
        token.approve(address(lending), 1000 ether);
        lending.deposit(1000 ether);
        lending.borrow(700 ether);  // 70% utilization
        vm.stopPrank();

        // Make position liquidatable
        lending.setPrice(0.75 ether);

        // Start liquidation
        vm.startPrank(liquidator);
        token.approve(address(lending), 300 ether);
        lending.liquidate(user1, 300 ether);
        vm.stopPrank();

        // User attempts to repay during liquidation
        vm.startPrank(user1);
        token.approve(address(lending), 200 ether);
        lending.repay(200 ether);
        vm.stopPrank();

        // Verify final state
        uint256 finalBorrow = lending.borrows(user1);
        assertLt(finalBorrow, 700 ether);
        assertGt(finalBorrow, 0);
    }

    function test_Scenario_MarketRecovery() public {
        // Scenario: Price recovers after partial liquidation

        // Setup initial position
        vm.startPrank(user1);
        token.approve(address(lending), 1000 ether);
        lending.deposit(1000 ether);
        lending.borrow(700 ether);
        vm.stopPrank();

        // Price drops and liquidation occurs
        lending.setPrice(0.75 ether);

        vm.startPrank(liquidator);
        token.approve(address(lending), 200 ether);
        lending.liquidate(user1, 200 ether);
        vm.stopPrank();

        // Price recovers
        lending.setPrice(1 ether);

        // User should be able to borrow again
        vm.startPrank(user1);
        uint256 borrowBefore = lending.borrows(user1);
        lending.borrow(100 ether);
        assertEq(lending.borrows(user1), borrowBefore + 100 ether);
        vm.stopPrank();
    }
}
In this example, we've created several scenario tests that explore different situations:
- Multiple users competing for limited liquidity
- Cascading liquidations during a market crash
- User attempting to repay while being liquidated
- Market recovery after partial liquidation
Each scenario focuses on a specific situation that could occur in the real world, testing how the contract handles these complex interactions.
Best Practices for Scenario Testing
1. Identify Critical Scenarios
Think about situations that could stress your system:
- Multiple users interacting simultaneously
- Edge cases in market conditions
- Resource competition
- Emergency situations
- Recovery scenarios
2. Document Scenarios Clearly
Tests are the living documentation for your code. It's crucial to maintain them with clear documentation. There's nothing wrong in over-commenting, so don't be shy.
Below is an example from maple-core-v2 scenario tests.
// Although the values here don't revert, if they were a bit higher, they would in the `getNextPaymentBreakdown` function.
// Currently, the way out of the situation would be to either:
// 1. Refinance using a custom fixedTermRefinancer that can manually alter the storage of the interest rate.
// 2. Close the loan, paying only the closing interest.

close(loan1);

// TotalAssets went down due to the loan closure.
assertEq(poolManager.totalAssets(), 4_000_000e6 + 90_000e6);  // 1% of 1_000_000e6, removing management fees

// Loan Manager should be in a coherent state
assertFixedTermLoanManager({
    loanManager:       loanManager,
    accruedInterest:   0,
    accountedInterest: 0,
    principalOut:      0,
    issuanceRate:      0,
    domainStart:       start + 800_000,
    domainEnd:         start + 800_000,
    unrealizedLosses:  0
});
3. Validate State Transitions
// Create helper functions to verify system state
function verifyUserPosition(
    address user,
    uint256 expectedDeposit,
    uint256 expectedBorrow
) internal {
    assertEq(lending.deposits(user), expectedDeposit);
    assertEq(lending.borrows(user), expectedBorrow);
    // Add other relevant checks
}
Common Pitfalls to Avoid
- Isolated Scenarios: Don't test scenarios in isolation when they might interact in reality
// WRONG: Testing liquidations without considering market conditions
function test_Scenario_Liquidation() public {
    // Direct liquidation setup without market context
}

// RIGHT: Include market context
function test_Scenario_LiquidationInVolatileMarket() public {
    // Setup market conditions
    // Simulate price volatility
    // Then test liquidation
}
- Oversimplified Scenarios: Ensure scenarios reflect real-world complexity
// WRONG: Oversimplified market crash scenario
lending.setPrice(0 ether);  // Unrealistic

// RIGHT: Realistic market movement
lending.setPrice(0.8 ether);  // 20% drop
// Test system behavior
lending.setPrice(0.6 ether);  // Further 20% drop
// Test system behavior again
- Missing State Verification: Always verify the complete state after scenario execution
// WRONG: Partial verification
function test_Scenario() public {
    // Execute scenario
    assertEq(lending.borrows(user), expectedBorrow);
}

// RIGHT: Complete verification
function test_Scenario() public {
    // Execute scenario
    verifySystemState({
        userBorrow: expectedBorrow,
        totalBorrows: expectedTotalBorrows,
        userDeposit: expectedDeposit,
        totalDeposits: expectedTotalDeposits
    });
}
Conclusion
Scenario testing complements lifecycle testing by exploring specific situations and edge cases that might occur during a contract's operation. While lifecycle tests give us confidence in the overall flow of our contract, scenario tests help us understand how it behaves in specific situations.
Remember that good scenario tests:
- Are based on realistic situations
- Test complex interactions between multiple components
- Verify the complete state after execution
- Document the scenario's purpose and expectations clearly
As your contract becomes more complex, maintaining a comprehensive suite of scenario tests becomes increasingly important. They serve as both a safety net and documentation, helping new or future contributors and auditors understand the various situations your contract is designed to handle.
In the next chapter, we'll explore mutation testing, where we deliberately introduce changes to our contract code to verify that our tests can catch potential bugs and vulnerabilities.
Bonus: Building a Scenario Test Runner
In our previous section, we explored scenario testing using straight forward foundry tests where each scenario is written as a separate test function. While this approach works, it can lead to repetitive code and makes it harder for non-technical stakeholders to understand and contribute to test scenarios. Overtime the tests may get very large, and it'll be difficult to maintain.
So in this bonus 🍬 chapter I'll showcase a more intuitive approach for defining and running scenario tests. I call it the Scenario tests runner.
From Traditional to Declarative Scenarios
Consider how we wrote scenarios in our previous approach:
function test_Scenario_MultipleUsersCompetingForLiquidity() public {
    // Setup initial state
    vm.startPrank(user1);
    token.approve(address(lending), 500 ether);
    lending.deposit(500 ether);
    vm.stopPrank();

    vm.startPrank(user2);
    token.approve(address(lending), 300 ether);
    lending.deposit(300 ether);
    vm.stopPrank();

    // More actions...
}

function test_Scenario_CascadingLiquidations() public {
    // Different but similar setup
    vm.startPrank(user1);
    token.approve(address(lending), 500 ether);
    lending.deposit(500 ether);
    vm.stopPrank();

    // More actions...
}
Notice the repetitive patterns? Each scenario:
- Sets up initial state
- Performs a series of actions
- Validates final state
- Requires Solidity knowledge to write or modify
We can transform these into declarative scenarios using a test runner:
{
  "description": "Multiple users competing for liquidity",
  "actions": [
    {
      "action": "deposit",
      "caller": "user1",
      "params": {
        "amount": "500000000000000000000"
      }
    },
    {
      "action": "deposit",
      "caller": "user2",
      "params": {
        "amount": "300000000000000000000"
      }
    }
  ],
  "expectedFinalState": {
    "totalDeposits": "800000000000000000000",
    "user1": {
      "deposits": "500000000000000000000"
    },
    "user2": {
      "deposits": "300000000000000000000"
    }
  }
}
This approach offers several immediate benefits:
- Scenarios are human-readable
- No code duplication
- Non-developers can write and review scenarios
- Scenarios serve as documentation
Architecture of the Runner
The Scenario Runner is built on a few key principles:
- Separation of Concerns: The runner separates the scenario definition (what to test) from the execution logic (how to test)
- Extensibility: New actions can be added without modifying the core runner
- Validation: Both input scenarios and execution results are validated
- Reusability: Common setup and teardown logic is handled automatically
Let's break down the key components:
Core Components
- Scenario Parser: Loads and validates JSON scenario files
- Action Router: Maps action types to their handlers
- State Validator: Verifies system state after scenario execution
- Address Book: Manages test addresses and roles
Action Handlers
Each action type (deposit, borrow, etc.) has its own handler that knows how to:
- Parse action parameters
- Execute the action
- Log relevant information
- Handle potential errors
Here's how we implement an action handler:
function handleDeposit(string memory caller, uint256 amount) internal {
    address callerAddr = addressBook[caller];

    // Handle token approval and deposit
    vm.startPrank(callerAddr);
    token.approve(address(lending), amount);
    lending.deposit(amount);
    vm.stopPrank();

    console.log("Deposit processed:", amount);
}
State Validation
The runner validates the final state against expected values:
function validateFinalState(string memory statePath) internal {
    console.log("\nValidating final state...");

    // Validate total protocol state
    uint256 expectedTotalDeposits = vm.parseJsonUint(
        json,
        string.concat(statePath, ".totalDeposits")
    );
    assertEq(
        lending.totalDeposits(),
        expectedTotalDeposits,
        "Total deposits mismatch"
    );

    // Validate individual user states
    string[] memory users = new string[](2);
    users[0] = "user1";
    users[1] = "user2";

    for(uint i = 0; i < users.length; i++) {
        try vm.parseJsonUint(
            json,
            string.concat(statePath, ".", users[i], ".deposits")
        ) returns (uint256 deposits) {
            validateUserState(users[i], deposits);
        } catch {
            continue;
        }
    }
}
I really like scenario testing via custom runners for each project as it helps me navigate multiple test paths. Other than that it could also provide other benefits such as:
-
Product owners and testers can write scenarios in a readable JSON format. These scenarios serve as both specifications and tests, ensuring alignment between business requirements and implementation.
-
Each scenario file serves as living documentation. New team members can understand system behavior by reading through scenario files:
{
  "description": "Market stress test - Multiple users competing for liquidity",
  "actions": [
    {
      "action": "deposit",
      "caller": "user1",
      "params": { "amount": "500000000000000000000" }
    },
    // ... more actions ...
  ]
}
- When bugs are discovered in production, they can be immediately translated into scenario tests:
{
  "description": "Bug #123 - Liquidation during price recovery",
  "actions": [
    // Steps to reproduce the bug
  ],
  "expectedFinalState": {
    // The correct state after fix
  }
}
- Since scenarios are data, we can generate them programmatically:
function generateStressScenarios() public {
    uint256[] memory prices = [1e18, 0.9e18, 0.8e18, 0.7e18];
    for(uint i = 0; i < prices.length; i++) {
        generateScenario(prices[i]);
    }
}
Tips to build your own runner:
- Each scenario should have a clear description and purpose
- Keep actions focused and single-purpose
- Verify all relevant state changes
- Include scenarios that test error conditions
- Start with simple scenarios and build up to complex ones
The current approach is a very basic one, to build a more advanced scenario test runner refer to Maple V2's implementation
Conclusion
The Scenario Runner pattern bridges the gap between business requirements and technical implementation, making tests more maintainable, readable, and valuable as documentation. By separating what from the how, it enables non-technical stakeholders to contribute directly to the testing process while maintaining the rigorous validation necessary for the protocol. The JSON scenarios become a shared language that everyone can understand and contribute to, making your testing process more inclusive and effective.
Mutation Tests
While testing methods like unit tests, fuzz tests, and invariant tests help verify that your code works as expected, mutation testing takes a different approach by verifying that your tests can actually catch bugs. It works by automatically introducing small changes (mutations) to your code and checking if your test suite catches these intentionally introduced bugs.
Think of mutation testing as a "test for your tests" - it helps ensure your test suite is robust enough to catch potential issues. For smart contracts where security is paramount, having strong test coverage isn't enough - you need to ensure your tests can actually detect problematic changes.
How Mutation Testing Works
- The mutation testing tool creates copies of your smart contract
- In each copy, it introduces a small change (mutation) like changing a
+to a-,>to<, ortruetofalse - It runs your test suite against each mutated version
- If your tests fail, that's good! It means they caught the mutation
- If your tests pass, that's concerning - it means they missed a potential bug
A mutation that survives (i.e., tests pass) is called a "mutant" and indicates a weakness in your test suite.
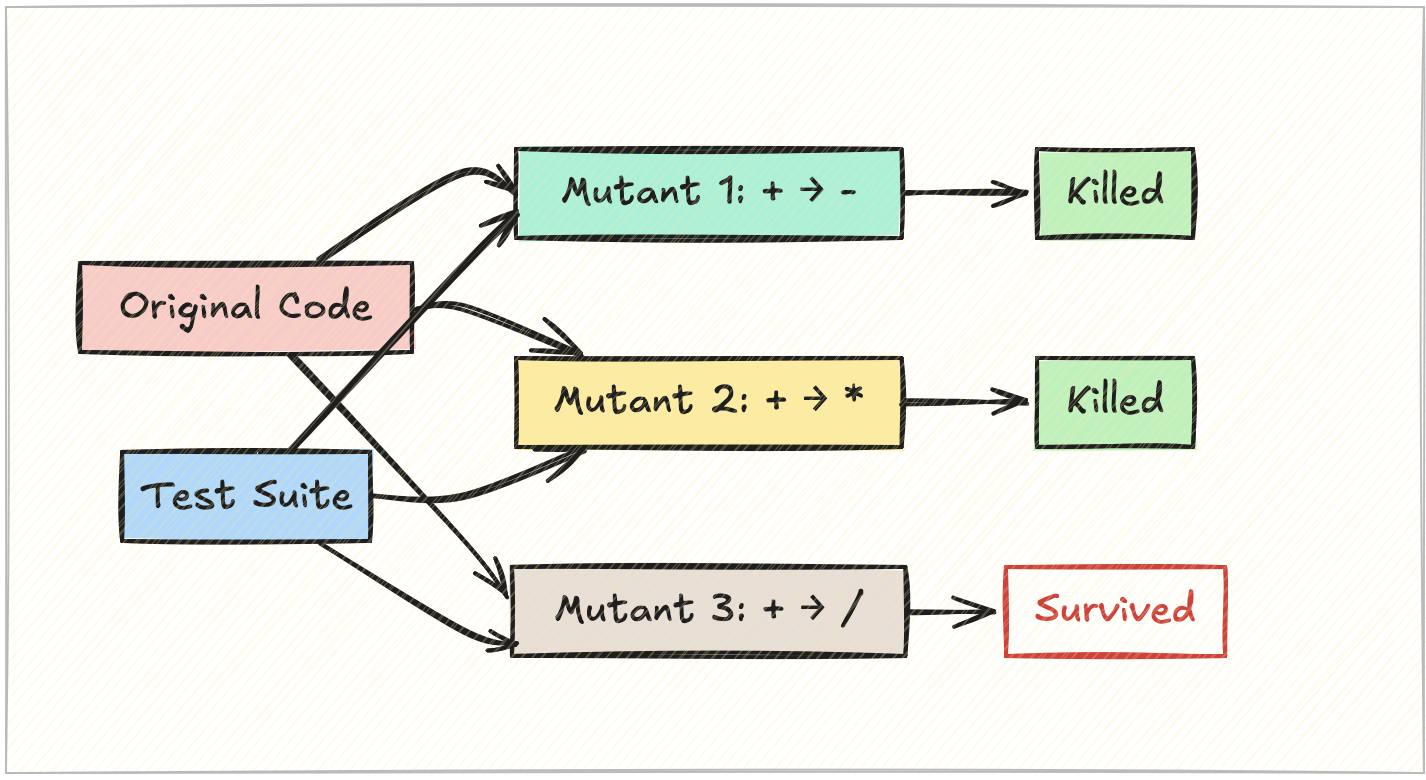
Common Mutation Operators
Some typical mutations that are used:
- Arithmetic: + → -, * → /, += → -=
- Boundary: > → >=, < → <=
- Boolean: true → false, && → ||
- Integer: increment/decrement values
- Assignment: = → +=
- Removal of Modifiers like
onlyOwner,whenNotPaused, etc.,
[!TIP] Unlike other tests, this can come as a last resort. This is a very optional testing method as I personally didn't find it much useful. But it could be useful for your usecase, who knows. So it's good to include mutation testing in your pipeline if you got some spare time.
Using Vertigo with Foundry
Let's look at a practical example using a token vesting contract. We'll use vertigo-rs, a mutation testing tool by RareSkills with Foundry support to assess and improve our test coverage.
Follow the steps in the vertigo-rs github repo, to setup and install it on your machine.
// Vesting.sol
    function initialize(
        address _beneficiary,
        uint256 _vestingDuration
    ) external onlyOwner onlyInState(VestingState.Uninitialized) {
        // Validate input parameters
        if (_beneficiary == address(0)) {
            revert ZeroAddress();
        }
        if (_vestingDuration == 0) {
            revert ZeroDuration();
        }

        beneficiary = _beneficiary;
        vestingDuration = _vestingDuration;
        state = VestingState.Initialized;

        emit VestingInitialized(_beneficiary, _vestingDuration);
    }


    function startVesting()
        external
        onlyOwner
        onlyInState(VestingState.Funded)
    {
        vestingStart = block.timestamp;
        state = VestingState.Vesting;
    }

 ...

    function pause() external onlyOwner {
        if (paused) {
            revert AlreadyPaused();
        }
        paused = true;
        emit VestingPaused();
    }

    function unpause() external onlyOwner {
        if (!paused) {
            revert NotPaused();
        }
        paused = false;
        emit VestingUnpaused();
    }
Unit test file:
// Vesting.t.sol
contract Vesting_UnitTest is Test {
    Vesting public vesting;
    MockERC20 public token;
    address public owner;
    address public beneficiary;
    uint256 public vestingDuration;
    uint256 public totalAmount;

    function setUp() public {
        owner = address(this);
        beneficiary = address(0x1);
        vestingDuration = 365 days;
        totalAmount = 1000 ether;

        vesting = new Vesting();
        token = new MockERC20("MockToken", "MTN");
        token.mint(owner, totalAmount);
    }

    function testStartVesting() public {
        vesting.initialize(beneficiary, vestingDuration);
        token.approve(address(vesting), totalAmount);
        vesting.fund(IERC20(address(token)), totalAmount);
        vesting.startVesting();

        assertEq(uint256(vesting.state()), uint256(Vesting.VestingState.Vesting));
        assertEq(vesting.vestingStart(), block.timestamp);
    }
}
Running Vertigo on this test suite:
vertigo run
Output might showing surviving mutants:
Mutation testing report:
Number of mutations:    15
Killed:                12 (80.00%)
Survived:              2 (20.00%)
Runtime:               8.12 seconds
Mutations:


[+] Survivors
 * Mutation:
    File: /solidity-testing-book/examples/src/Vesting.sol
    Line nr: 163
    Result: Lived
    Original line:
             function pause() external onlyOwner {

    Mutated line:
             function pause() external  {

Mutation:
    File: /solidity-testing-book/examples/src/Vesting.sol
    Line nr: 171
    Result: Lived
    Original line:
             function unpause() external onlyOwner {

    Mutated line:
             function unpause() external  {
These surviving mutants reveal gaps in our test coverag as you can see we don't have tests to make sure only the owner can pause/unpause the contract.
  function test_Pausability_onlyOwner() public {
        vm.expectRevert(
            abi.encodeWithSignature(
                "OwnableUnauthorizedAccount(address)",
                address(0xcafe)
            )
        );
        vm.prank(address(0xcafe));
        vesting.pause();

        vm.expectRevert(
            abi.encodeWithSignature(
                "OwnableUnauthorizedAccount(address)",
                address(0xcafe)
            )
        );
        vm.prank(address(0xcafe));
        vesting.unpause();
    }
Let's run Vertigo to check if the new tests kill the mutants.
Mutation testing report:
Number of mutations:    15
Killed:                15 (100.00%)
Survived:              0 (0.00%)
Runtime:               8.45 seconds
Awesome, we can see that by adding new tests validate all mutants are killed showing our tests became stronger by covering more cases.
When to Use Mutation Testing
Eventhough mutation testing can be valuable in certain scenarios, there can be some trade-offs:
- Runtime can be slow as each mutation requires a full test run
- Higher rate of generating false positives that need manual review
- Best used on core contract logic / math heavy functions rather than auxiliary functions
Best Practices
- Start with unit tests and invariant tests before mutation testing
- Focus on critical functions first - don't try to achieve 100% mutation coverage everywhere
- Use mutation testing results to identify areas needing more test cases
- Add test cases that specifically target edge conditions highlighted by surviving mutants
- Document why certain mutants were ignored if they represent impossible scenarios
Conclusion
Mutation testing adds another layer of confidence to your smart contract testing strategy. While it requires more computational resources than traditional testing, the insights it provides about test suite effectiveness can be quite useful in some scenarios. Use it strategically on your most important code paths to maximize its benefits. If you got that additional spare week before sending your contracts to audit, you can quickly use the mutation test tools to strengthen your testsuite.
Other resources:
- Rareskills - Solidity Mutation Testing
- Gambit - Mutation testing tool by Certora
- Sumo - Mutation testing tool
Formal Verification
Okay this one is gonna be much detailed than other chapters as there's a quite a bit to cover. Feel free to read this chapter at your own pace.
At some cases, “tests pass” might not be just enough for the code owners to get a good night's sleep - they want a proof that certain bad states are unreachable. This is where formal verification helps. In this chapter we introduce the workflow with the Certora Prover and CVL (Certora Verification Language), write a minimal spec, run it, interpret results, and close with practical tips you can apply on real codebases.
[!TIP] There are other tools for formal verification too, similar to Solidity Compiler's SMTChecker, etc., but we only over Certora as it is widely used. Most principles explained here will apply for other tools too.
When you write smart contracts, you're not just writing code that needs to work today, you're creating software programs that will handle real money, potentially forever. Traditional testing approaches, while valuable, can only check specific scenarios you think to test. Formal verification offers the mathematical proof that certain properties hold for all possible inputs and sequences of operations. Think of it as the difference between testing whether your door lock works with your key versus mathematically proving that no other key in existence can open it.
Understanding Formal Verification (100ft view)
Before diving into tools and syntax, let me explain what formal verification actually means in practical terms. When you write a unit test, you're essentially asking "does my function work correctly when I call it with these specific values?" You might test depositing 100 tokens, then 1000 tokens, then edge cases like zero or maximum values. Each test gives you one data point of confidence. But between those data points lie infinite other possibilities that remain untested.
Formal verification inverts this approach entirely. Instead of providing specific inputs and checking outputs, you write logical statements (the "spec") about what must always be true, and a mathematical engine called a theorem prover attempts to either prove these statements hold for all possible inputs or finds a specific counterexample that violates them. When the prover succeeds in verification, you haven't just tested thousands of scenarios, you've obtained a mathematical proof that covers the entire input space within the model's bounds.
The key insight is that the prover doesn't execute your contract repeatedly with different values. Instead, it performs symbolic execution, treating variables as mathematical symbols and reasoning about all their possible values simultaneously. This is what enables it to make universal statements like "for any amount and any user, this property holds" rather than just "this property holds for amount equals 100 and user equals Alice."
 |
|---|
| Certora Prover Architecture (Source) |
Example: The Funds Manager
Consider we have a fund manager contract The manager system allows creating funds where each fund has exactly one current manager. Managers can transfer their role by nominating a pending manager, who must then claim management. The critical invariant is that each manager can only manage one fund at a time and no manager can be responsible for multiple funds.
This contract was taken from Certora's Github.
contract Manager is IManager {
     mapping(uint256 => ManagedFund) public funds;

     mapping(address => bool) private _isActiveManager;

    function isActiveManager(address manager) public view returns (bool) {
        return _isActiveManager[manager];
    }

    function createFund(uint256 fundId) public {
        require(msg.sender != address(0));
        require(funds[fundId].currentManager == address(0));
        require(!isActiveManager(msg.sender));  // prevent managing multiple funds
        funds[fundId].currentManager = msg.sender;
        _isActiveManager[msg.sender] = true;
    }

    function setPendingManager(uint256 fundId, address pending) public {
        require(funds[fundId].currentManager == msg.sender);
        funds[fundId].pendingManager = pending;
    }

    function claimManagement(uint256 fundId) public {
        require(msg.sender != address(0) && funds[fundId].currentManager != address(0));
        require(funds[fundId].pendingManager == msg.sender);
        require(!isActiveManager(msg.sender));  // New manager can't already manage a fund

        _isActiveManager[funds[fundId].currentManager] = false;
        funds[fundId].currentManager = msg.sender;
        funds[fundId].pendingManager = address(0);
        _isActiveManager[msg.sender] = true;
    }

    function getCurrentManager(uint256 fundId) public view returns (address) {
        return funds[fundId].currentManager;
    }

    function getPendingManager(uint256 fundId) public view returns (address) {
        return funds[fundId].pendingManager;
    }
}
Now we'll introduce some bugs to the above contract to understand how formal verification helps you uncover them. It should give you a broad idea of how to approach formal verification for your contracts.
I might not deep dive into all the concepts like syntax, keywords, etc., you can always pause and look it from their docs for more clarity.
Basic Properties
Let's start with a basic spec file. Create Manager.spec:
methods {
    function getCurrentManager(uint256) external returns (address) envfree;
    function getPendingManager(uint256) external returns (address) envfree;
    function isActiveManager(address) external returns (bool) envfree;
}
This methods block declares view functions as envfree, meaning they don't need transaction context. So we can call getCurrentManager(fundId) instead of getCurrentManager(e, fundId).
Now let's verify a basic property about fund creation:
rule createFundSetsManager(uint256 fundId) {
    env e;

    // Preconditions: fund doesn't exist yet, caller is not already a manager
    require getCurrentManager(fundId) == 0;
    require !isActiveManager(e.msg.sender);

    createFund(e, fundId);

    // After creating fund, the caller should be the manager
    assert getCurrentManager(fundId) == e.msg.sender,
        "Creator should become the fund manager";

    assert isActiveManager(e.msg.sender),
        "Creator should be marked as active manager";
}
This rule checks two things: the fund is created with the correct manager, and the manager is marked as active.
We need to create a config file ManagerBug1.conf to initiate the run on certora prover.
{
    "files": [
        "ManagerBug.sol"
    ],
    "verify": "Manager:Manager.v1.spec",
    "wait_for_results": "all",
    "rule_sanity": "basic",
    "msg": "Funds managers verification"
}
We can initiate a run using the following command:
certoraRun ManagerBug1.conf
You can see it runs fine and no errors on the output.
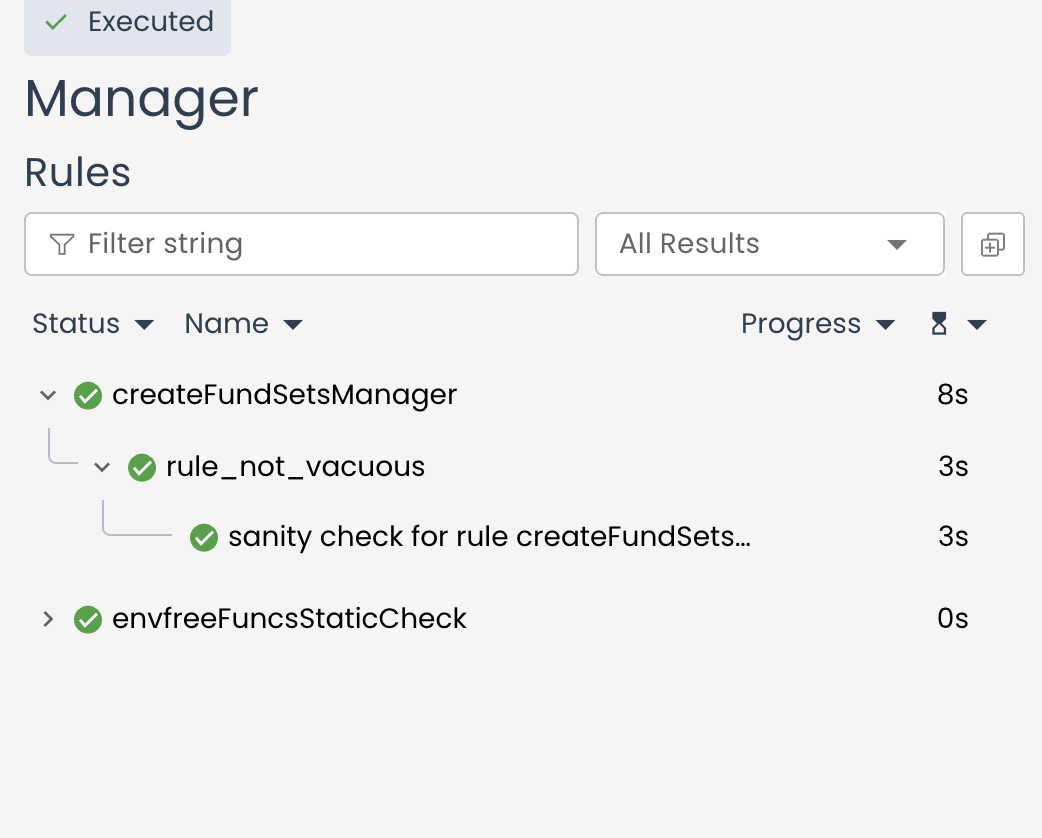
Now let's introduce a bug in ManagerBug1.sol, which is missing one critical requirement:
function createFund(uint256 fundId) public {
    require(msg.sender != address(0));
    require(funds[fundId].currentManager == address(0));
    // BUG: Missing this check!
    // require(!isActiveManager(msg.sender));
    funds[fundId].currentManager = msg.sender;
    _isActiveManager[msg.sender] = true;
}
Next up let's add an invariant that should catch this bug. The key property is that a manager can only manage one fund. We'll include this with the uniqueManager invariant:
function isManaged(uint256 fundId) returns bool {
    return getCurrentManager(fundId) != 0;
}

// Two different funds cannot have the same manager
invariant uniqueManager(uint256 fundId1, uint256 fundId2)
    ((fundId1 != fundId2) && isManaged(fundId1)) => (
        getCurrentManager(fundId1) != getCurrentManager(fundId2)
    )
This means: "For any two different fund IDs, if the first fund exists, then the managers must be different."
When you run:
certoraRun Manager.v2.conf
You should see something like this
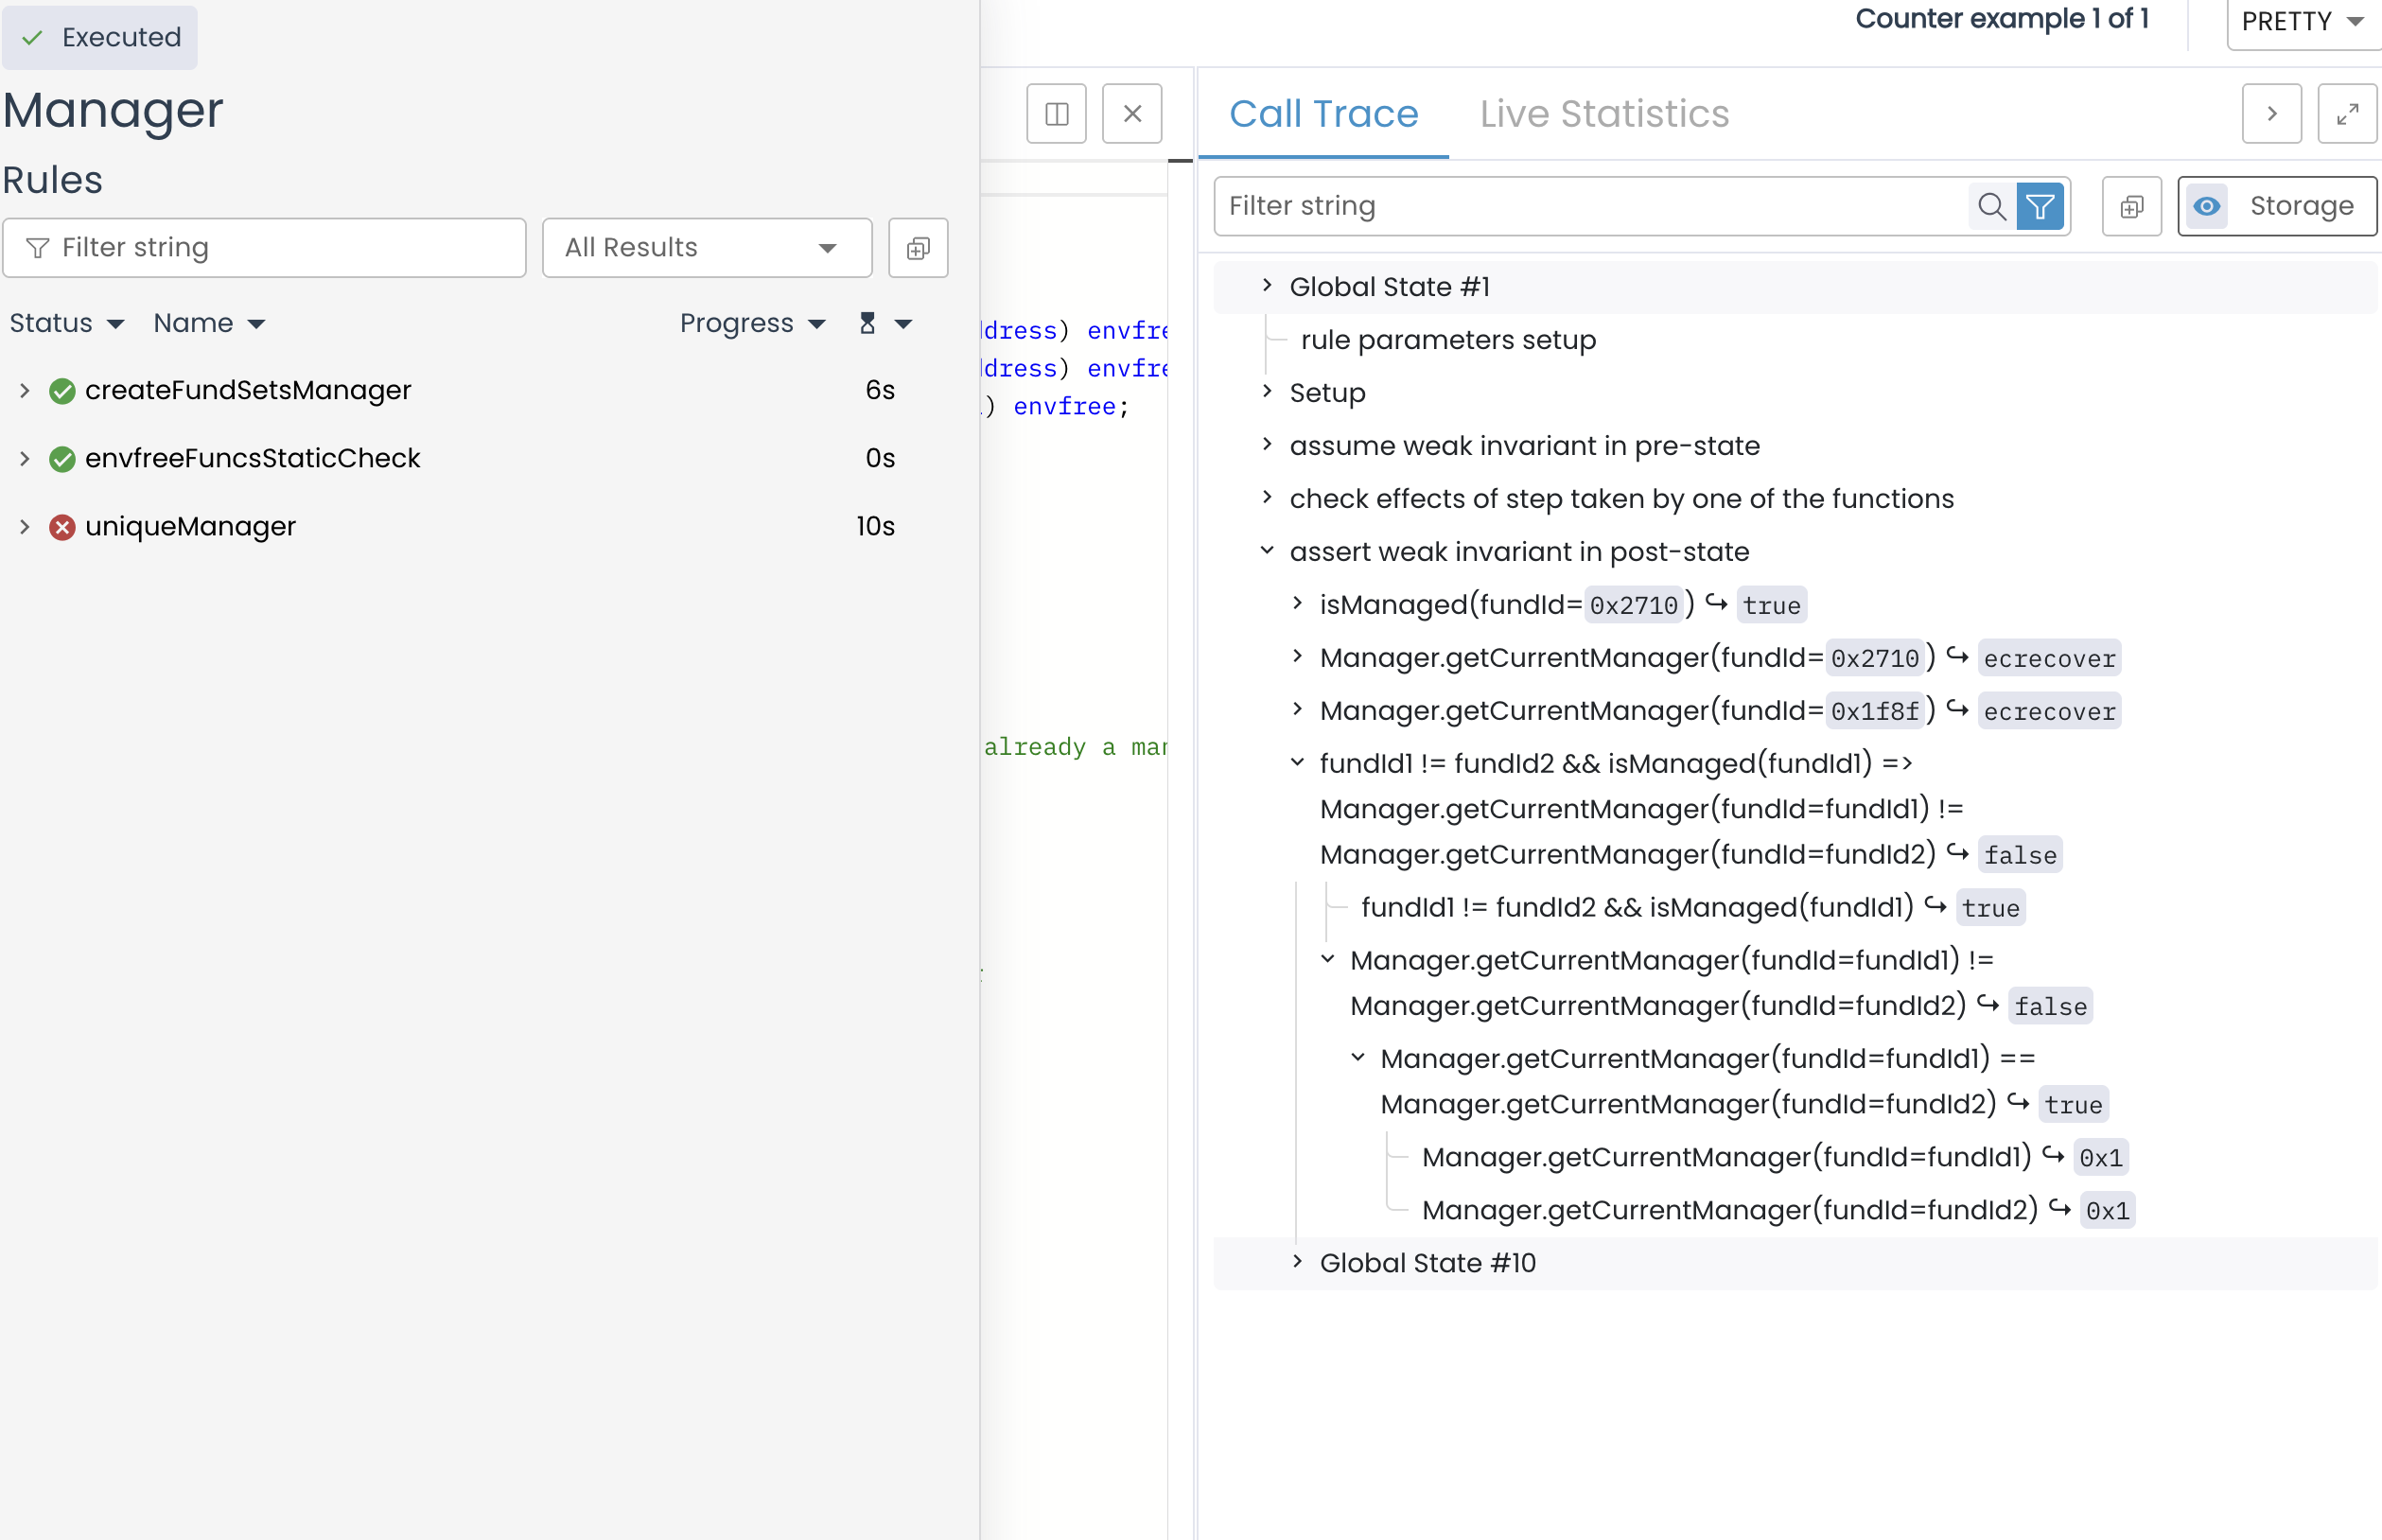
The prover found a violation! You can see the uniqueManager invariant has failed in the output. The stack trace (in the right side) shows that Manager.getCurrentManager(fund1) == Manager.getCurrentManager(fund2) which shouldn't be the case.
This exposes the bug: without checking !isActiveManager(msg.sender), someone can create multiple funds and manage them all, violating the uniqueness requirement.
Now let's add another bug in the contract (ManagerBug2.sol), which is even more subtle.
function claimManagement(uint256 fundId) public {
    require(msg.sender != address(0) && funds[fundId].currentManager != address(0));
    require(funds[fundId].pendingManager == msg.sender);
    require(!isActiveManager(msg.sender));

    _isActiveManager[funds[fundId].currentManager] = false;
    funds[fundId].currentManager = msg.sender;
    funds[fundId].pendingManager = address(0);
    _isActiveManager[msg.sender] == true;  // BUG: == instead of =
}
This compiles without error because the comparison returns a boolean that's then discarded. But it means _isActiveManager[msg.sender] never gets set to true!
Let's add another invariant to catch this:
invariant managerIsActive(uint256 fundId)
    isManaged(fundId) <=> isActiveManager(getCurrentManager(fundId))
This uses the bi-implication operator <=> which reads "if and only if". It means that: "A fund is managed if and only if its current manager is marked as active." This should always be true ie., whenever a fund exists, its manager should be in the active set, and vice versa.
When you run it, the prover finds that after someone claims management, the fund exists but the new manager is NOT marked as active (Manager.isActiveManger() == false)
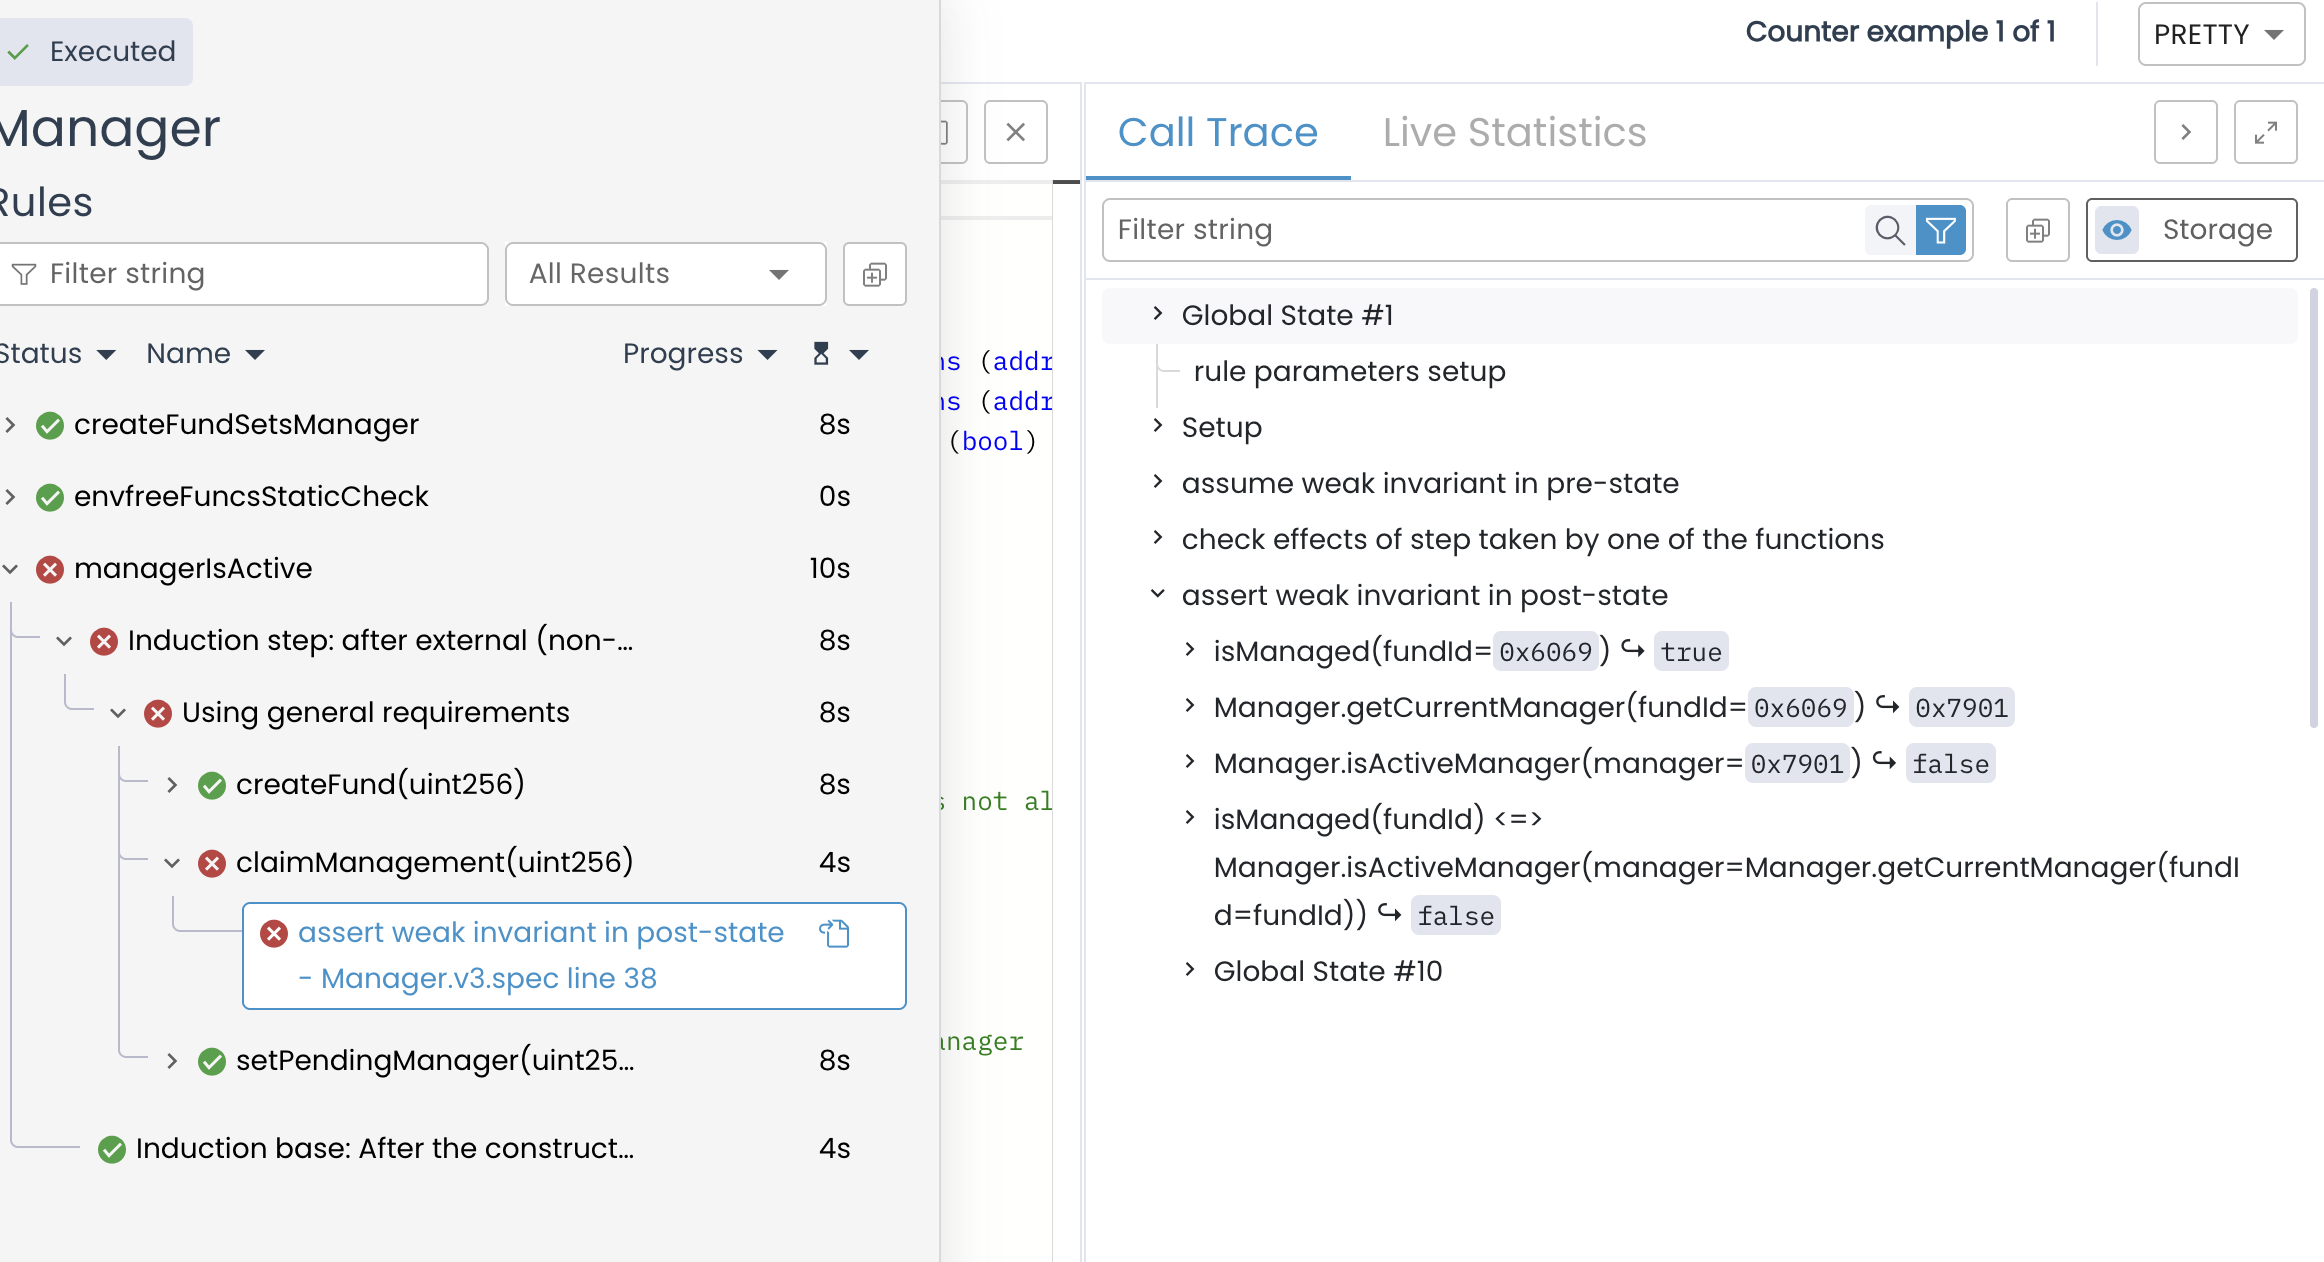
Invariants with Ghost Variables
One of the nice features of Certora is using ghost variables to track relationships that aren't explicitly stored in the contract. Let's create an inverse mapping from managers to their funds:
methods {
    function getCurrentManager(uint256) external returns (address) envfree;
    function getPendingManager(uint256) external returns (address) envfree;
    function isActiveManager(address) external returns (bool) envfree;
}

/// @title The inverse mapping from managers to fund ids
ghost mapping(address => uint256) managersFunds;

// Hook that watches for changes to the currentManager field
hook Sstore funds[KEY uint256 fundId].(offset 0) address newManager {
    managersFunds[newManager] = fundId;
}
The ghost mapping(address => uint256) managersFunds creates a specification-only variable that doesn't exist in the actual contract. It maps each manager address to the fundId they manage.
The hook says: "Whenever the contract stores a new value to funds[fundId].currentManager (which is at offset 0 in the struct), automatically update our ghost mapping to record that this manager now manages this fund."
Now let's write an invariant using this ghost:
/// @title Address zero is never an active manager
invariant zeroIsNeverActive()
    !isActiveManager(0)

/// @title Every active manager has a fund they manage
invariant activeManagesAFund(address manager)
    isActiveManager(manager) => getCurrentManager(managersFunds[manager]) == manager
    {
        preserved {
            requireInvariant zeroIsNeverActive();
        }
    }
The activeManagesAFund invariant says "If someone is marked as an active manager, then when we look up which fund they manage (using our ghost), that fund's current manager should indeed be them."
Note there's a preserved block. It specifies additional requirements that must hold before any function call when checking this invariant. We require that zeroIsNeverActive() holds, which helps the prover avoid false counterexamples involving the zero address.
Using Preserved Blocks for Complex Invariants
The following spec shows how to properly verify the uniqueness property with preserved blocks:
methods {
    function getCurrentManager(uint256) external returns (address) envfree;
    function getPendingManager(uint256) external returns (address) envfree;
    function isActiveManager(address) external returns (bool) envfree;
}


/// A utility function
/// @return whether the fund exists
function isManaged(uint256 fundId) returns bool {
    return getCurrentManager(fundId) != 0;
}


/// @title A fund's manager is active
invariant managerIsActive(uint256 fundId)
    isManaged(fundId) <=> isActiveManager(getCurrentManager(fundId))
    {
        preserved claimManagement(uint256 fundId2) with (env e) {
            requireInvariant uniqueManager(fundId, fundId2);
        }
    }


/// @title A fund has a unique manager
invariant uniqueManager(uint256 fundId1, uint256 fundId2)
	((fundId1 != fundId2) && isManaged(fundId1)) => (
        getCurrentManager(fundId1) != getCurrentManager(fundId2)
    ) {
        preserved {
            requireInvariant managerIsActive(fundId1);
            requireInvariant managerIsActive(fundId2);
        }
    }
The uniqueManager invariant has a preserved block that requires managerIsActive holds for both funds. This tells the prover: "When checking if uniqueManager is preserved by some function, you can assume that managerIsActive already holds."
The managerIsActive invariant has a more specific preserved block just for claimManagement. It says: "When checking if managerIsActive is preserved by claimManagement specifically, you can assume uniqueManager holds between the two fund IDs involved."
This creates a mutually reinforcing relationship between the invariants. The prover verifies them together, using each to help prove the other. This is called inductive reasoning which means each invariant helps prove the others remain true after any operation.
Parametric Rules
Parametric rules is a feature in CVL that allow you to write rules for any method of a contract, not just specific ones. By using undefined method variables (like method f), the Certora Prover simulates the execution of all possible methods, ensuring that a property holds true regardless of which contract method is called. Let's write a parametric rule that checks a general property across all functions:
rule onlyAuthorizedCanChangeManager(method f, uint256 fundId) {
    address managerBefore = getCurrentManager(fundId);

    env e;
    calldataarg args;
    f(e, args);

    address managerAfter = getCurrentManager(fundId);

    // If the manager changed, it must have been through specific functions
    assert managerBefore != managerAfter => (
        f.selector == sig:createFund(uint256).selector ||
        f.selector == sig:claimManagement(uint256).selector
    ), "Manager should only change through createFund or claimManagement";
}
This rule checks every function in the contract to ensure that only createFund and claimManagement can change who manages a fund. The setPendingManager function shouldn't change the current manager,it only sets the pending one.
Failure Case for the Parametric Rule
The parametric rule would fail if we had a bug where an unauthorized function modifies the manager. Imagine a version where setPendingManager accidentally changes the current manager instead of just the pending one:
// Buggy setPendingManager
function setPendingManager(uint256 fundId, address pending) public {
    require(funds[fundId].currentManager == msg.sender);
    // BUG: Accidentally setting currentManager instead of pendingManager
    funds[fundId].currentManager = pending;
    funds[fundId].pendingManager = pending;
}
You can find the full spec ran on the bug-free Manager.sol contract and here are the results
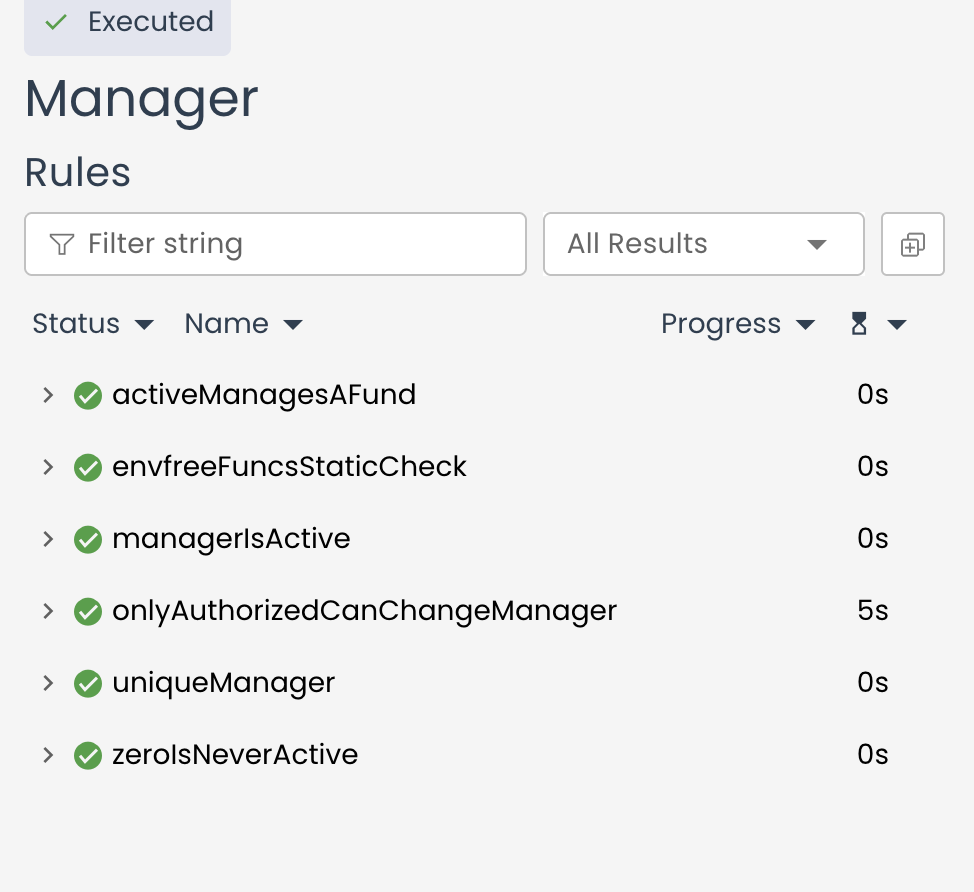
How to apply this practically?
The Manager example demonstrates all the basic rules, invariants, ghost variables, hooks, preserved blocks, and parametric rules with a practical example to help you understand better. But you can only get good at writing specs by repeated practice.
You must start by understanding your contract's fundamental purpose and identifying what correctness means. Ask yourself what are the core guarantees this contract must provide? For a vault, it's preservation of assets and correct accounting. For a governance system, it's preventing unauthorized actions and counting votes correctly. For an auction, it's ensuring the highest bidder wins and funds flow correctly. Write these guarantees down in plain English before starting with the CVL.
Next, identify your contract's important state variables and how they relate to each other. Draw the relationships...does the sum of balances need to equal a total? Must certain state variables always get updated together (like balance and supply)? Are there ratios that must be maintained? These relationships become your invariants.
Then, think through your contract's state transitions. What are the major operations users can perform? For each operation, ask: what must be true before this operation (preconditions)? What should change as a result (postconditions)? What should remain unchanged? These questions directly map to CVL rules.
Most importantly, consider what should never happen. Users shouldn't lose funds. The contract shouldn't become insolvent. Critical values shouldn't decrease except through specific functions. These negative properties often catch the most serious bugs.
Start with the simplest rules and invariants first. Don't try to verify everything at once. Begin with obvious properties like "deposit increases balance" or "sum of parts equals total." Get these working, understand the tool, then gradually add more sophisticated properties.
Found a bug?

When you get counterexamples, resist the urge to immediately "fix" the specification. First understand whether the counterexample reveals a real bug in the contract or an incorrect assumption in your specification. Often, the first counterexamples point to edge cases you hadn't considered, and these edge cases frequently represent real vulnerabilities. Test the tests!
Use parametric rules to check properties across all functions efficiently. Instead of writing separate rules for how each function affects balances, write one parametric rule and let the prover check it against every function. This scales much better as contracts grow.
Layer your verification. Start with basic safety properties, then add more complex correctness properties, then tackle liveness and performance properties if relevant. Each layer builds confidence incrementally.
Nah I'm good - already got 100% coverage
Line and branch coverage are good but one shouldn't assume the strength of their test suite just by that single metric. Let me walk through exactly how each testing approach would (or wouldn't) catch the bugs in our Manager example. This concrete comparison shows the fundamental differences.
Bug 1: Missing require(!isActiveManager(msg.sender)) in createFund
Unit Test:
function testCreateMultipleFunds() public {
    vm.prank(alice);
    manager.createFund(1);

    vm.prank(alice);
    manager.createFund(2);

    // Would need to explicitly check this specific violation
    assertEq(manager.getCurrentManager(1), alice);
    assertEq(manager.getCurrentManager(2), alice);
    // But would you think to assert this is WRONG?
}
Unit tests only catch this if you specifically think to write a test that tries creating multiple funds with the same user AND you remember to assert that this should fail. Most developers would write tests for the happy path (user creates one fund successfully) but might not think "what if they create a second fund?"
Invariant/Fuzz Testing:
function invariant_uniqueManagers() public {
    // How do you even express this?
    // You'd need to iterate all funds and check uniqueness
    // But you don't know which fundIds exist
}
Invariant testing struggles here because:
- You don't know which fund IDs have been created
- You'd need to track all managers and their funds somehow
- The property requires quantifying over all pairs of funds
Fuzz testing might eventually stumble upon it if you fuzz "call createFund twice with same user" but only if you set up the test to try that specific sequence.
Formal Verification:
invariant uniqueManager(uint256 fundId1, uint256 fundId2)
    ((fundId1 != fundId2) && isManaged(fundId1)) => (
        getCurrentManager(fundId1) != getCurrentManager(fundId2)
    )
The prover automatically:
- Considers all possible pairs of fund IDs
- Tries all possible sequences of operations
- Finds the minimal counterexample: "Create fund 1, then create fund 2 with same user"
- No need to guess which scenario to test
Bug 2: Using == instead of = in claimManagement()
Unit Testing:
function testClaimManagement() public {
    vm.prank(alice);
    manager.createFund(1);

    vm.prank(alice);
    manager.setPendingManager(1, bob);

    vm.prank(bob);
    manager.claimManagement(1);

    assertEq(manager.getCurrentManager(1), bob); // PASSES
    // But would you check this?
    assertTrue(manager.isActiveManager(bob)); // FAILS - but did you write this?
}
Unit tests only catch this if you explicitly check the isActiveManager state after claiming. Many developers would only verify that the currentManager was updated correctly, missing that the active manager flag wasn't set.
Fuzz Testing:
Fuzz testing has the same problem - it would only catch this if you're specifically checking the isActiveManager mapping after operations. And even then, you need to know what to check for.
Formal Verification:
invariant managerIsActive(uint256 fundId)
    isManaged(fundId) <=> isActiveManager(getCurrentManager(fundId))
The prover automatically checks this relationship after every single function call. It immediately finds: "After claimManagement, the fund exists but the manager is not marked as active - invariant violated!"
| Approach | Search Space | Coverage | What You Catch | What You Miss |
|---|---|---|---|---|
| Unit Tests | Manual path exploration | Dozens to hundreds of scenarios | Bugs in paths you explicitly test | Paths you didn't think to test |
| Fuzz Tests | Random input space exploration | Thousands to millions of random scenarios | Bugs that appear with reasonable probability | Rare combinations, bugs requiring specific sequences |
| Invariant Tests | Random operation sequences | Thousands of random operation sequences | Property violations in tested sequences | Sequences not randomly generated, complex multi-contract states |
| Formal Verification | Exhaustive symbolic exploration | ALL possible inputs and states (within model bounds) | Any violation of the specified properties | Only what you didn't specify |
The tradeoff is that formal verification requires:
- Steep learning curve for the new specification language (CVL) and tools
- Thinking precisely about properties
- Dealing with false positives from over-approximation
It doesn't mean that formal verification is the best method to find bugs. As mentioned by Leo Alt in this video "No single tool or technique can both prove correctness or find bugs consistently. Every method has its own strengths in different contexts, but none is universally reliable." So we would need a mix of all to have better confidence in our contract.
Integrating Formal Verification into dev pipeline
Formal verification can be quite powerful when integrated into your normal development workflow, not treated as a separate audit step at the end.
- Write specifications alongside your contract code, not after.
- When you add a new function, immediately write rules about its behavior. This helps you think through the function's semantics clearly and catches bugs while the code is fresh in your mind.
Run verification regularly, not just before deployment. Make it part of your continuous integration pipeline. A failing verification caught during development is infinitely cheaper than one discovered after deployment. You can even run verification on pull requests automatically. Maintain your specification as living documentation. Unlike comments, formal specifications are machine-checked. They can't become outdated without failing verification. This makes them invaluable for onboarding new team members and reasoning about contract behavior months later.
When specifications fail after changes, this is the system working correctly...you've been notified that a change violated expected properties. Investigate whether the change introduced a bug or whether the specifications need updating to satisfy the intended behavior.
[!TIP] This might not be suitable for all teams and projects as it might be time consuming but if you got that extra time I highly recommend integrating formal verification early on in your development and testing pipeline.
If you don't have enough time to integrate formal verification during development, do it in parallel when the code is under audit (code freeze) or even you can look into formally verifying your contracts post deployment.
Conclusion
Instead of wondering whether an edge case exists that breaks your invariants, you can verify your invariants are truly satisfied. The learning curve is quite steep. Formal verification requires thinking precisely about properties and learning new tools and languages. But once tackled the payoff could be huge.
So I suggest you to start small, with simple rules on simple contracts. Build your intuition for how the prover thinks and what makes good specifications. Gradually tackle more complex properties and larger contracts. Over time, you'll develop a mental model for reasoning about contract correctness that makes you a better developer even when you're not actively running the prover. Success requires a deep understanding of both the contracts and the tools themselves.
For further exploration:
- Leo Alt : Fully Automated Formal Verification: How far can we go?
- An Introduction to Formal Verification With Certora
- The Certora Prover Technology: A Gentle Introduction
- If you wanna deep dive into formal methods (DeFi)
- https://github.com/leonardoalt/ethereum_formal_verification_overview
Symbolic Testing
In the formal verification chapter, we explored Certora and CVL to mathematically prove properties of the smart contract logic. Now we'll look at symbolic testing, which is a light-weight form of formal verification that integrates directly with your existing test suite.
Symbolic testing analyzes your code with symbolic values instead of concrete inputs. When you write a normal test with amount = 100, you're testing one specific scenario. With symbolic testing, amount becomes a mathematical symbol representing all possible uint256 values simultaneously. The symbolic execution engine explores your code's execution paths and checks whether any combination of inputs can violate your assertions.
Understanding Symbolic Execution
Let's start with the fundamentals. When you run a normal unit test, your code executes with specific concrete values. If your test calls withdraw(1000), the EVM executes that exact transaction with that exact amount. Symbolic execution works differently. It treats input variables as symbols rather than numbers, representing arbitrary values that haven't been determined yet.
Consider this simple function:
function foobar(int a, int b) public pure {
    int x = 1;
    int y = 0;
    if (a != 0) {
        y = 3 + x;      // y = 4
        if (b == 0) {
            x = 2 * (a + b);
        }
    }
    assert(x - y != 0);
}
Here's how symbolic execution explores all paths through this function:

The symbolic engine starts with symbolic values α and β for inputs a and b. As it executes, it forks at each branch, creating separate paths with different constraints. Path 2 (when a = 0) is safe, the assertion holds. Path 1b (when a ≠ 0 and b ≠ 0) is also safe. But Path 1a reveals a problem: when the SMT solver checks if 2*a - 4 can equal zero with the constraints a ≠ 0 and b = 0, it finds a = 2, b = 0 violates the assertion. This is your counterexample.
When symbolic execution encounters a branch like if (amount > balance) in a withdrawal function, it doesn't pick one path. Instead, it explores both paths simultaneously. For the first path, it records the constraint that amount <= balance must hold. For the second path, it records that amount > balance must hold. The symbolic engine maintains these constraints throughout execution.
At the end of each path, if your code contains assertions, the symbolic engine asks an SMT solver a question: can any concrete values satisfy all the constraints along this path and violate the assertion? If the solver finds such values, you've got a counterexample showing exactly how to trigger the bug. If the solver proves no such values exist, that path is safe.
[!INFO] Symbolic execution doesn't run your code millions of times with different inputs. It runs your code once with symbolic inputs and uses mathematical reasoning to determine what's possible across all inputs. This is why it can find bugs that fuzzing misses, even after millions of runs.
The Mechanics of Symbolic Execution
The symbolic execution engine maintains two key pieces of state for each execution path.
- Symbolic memory store maps variables to symbolic expressions.
- Path condition, a logical formula capturing all the constraints that must hold for this execution path to be reachable.
When your function starts executing, input parameters are assigned symbolic values. Instead of passing concrete numbers, mathematical symbols are used to represent any possible value of that type. As execution proceeds, operations on symbolic values produce new symbolic expressions. If you write uint256 z = x - 1 where x is symbolic, then z becomes the symbolic expression (x - 1).
Branches are where it gets interesting. When the engine hits if (z == 10), it forks execution into two separate paths. On the true branch, it adds the constraint (x - 1) == 10 to the path condition. On the false branch, it adds the negation: (x - 1) != 10. Now you have two independent execution paths being explored simultaneously, each with its own constraints.
This forking happens at every branch in your code. 10 if statements create up to 1024 potential execution paths. This is called path explosion, and it's the primary challenge in symbolic execution. Loops make it worse. An unbounded loop could create infinite paths. This is why you need to carefully constrain your symbolic tests.
At assertion points, the engine checks each path. For a path to violate an assertion, two things must be true:
-
The path condition must be satisfiable (there must exist concrete values that satisfy all the constraints accumulated along this path)
-
Those values must also satisfy the negation of your assertion. The engine constructs a formula combining the path condition with the negated assertion and hands it to an SMT solver.
SMT solvers like Z3, cvc5, Boolector, and Yices2 are mathematical engines that determine if a logical formula is satisfiable. If the solver finds a satisfying assignment, it returns concrete values that trigger the bug. If it proves the formula unsatisfiable, this path cannot violate the assertion. Different solvers have different strengths. Z3 is general-purpose and widely used. Yices2 and Boolector often perform better on bitvector constraints, which are common in EVM bytecode analysis, etc.,
Symbolic Testing vs Fuzzing
Let's make the comparison with an example that highlights the fundamental difference between these approaches.
Consider this simple function:
function check(uint256 x) external pure {
    uint256 z = x - 1;
    if (z == 6912213124124531) {
        assert(false);
    }
}
If you fuzz this function with Foundry's default configuration, it runs 256 tests with random inputs. The probability of randomly generating x = 6912213124124532 is roughly 1 in 2^256.
You could run the fuzzer for 10 million iterations and still never hit it. The fuzzer reports success, suggesting the assertion never fails.
[PASS] testFuzz_check(uint256) (runs: 256, μ: 9204, ~: 9204)
Suite result: ok. 1 passed; 0 failed; 0 skipped; finished in 14.26ms (9.85ms CPU time)
If we run symbolic testing on the same function, the symbolic engine treats x as a symbolic value and executes the code. When it reaches the branch, it adds the constraint (x - 1) == 6912213124124531 to the path condition. It then checks if this constraint is satisfiable. The SMT solver immediately responds: yes, this is satisfiable when x = 6912213124124532.
The symbolic test found the bug in milliseconds.
Counterexample:
    p_x_uint256_a611e6e_00 = 0x188e9f07e00f74
[FAIL] check_property(uint256) (paths: 3, time: 0.13s, bounds: [])
Symbolic test result: 0 passed; 1 failed; time: 0.15s
Fuzzing is blind search through the input space. It works well when bugs are common or when any of many possible inputs trigger them. Symbolic testing is systematic search guided by program logic. It works well when bugs require specific values that satisfy certain mathematical constraints.
The takeaway is that neither tool dominates. Fuzzing excels in exploring complex sequences, and finding various types of bugs quickly. Symbolic testing is good at finding precise edge cases and verifying mathematical properties.
In practice, we should use fuzzing to explore the space of possible behaviors broadly. Use symbolic testing to verify specific properties deeply. They complement each other.
When Symbolic Testing Provides Maximum Value
Similar to formal verification, not all contracts require symbol testing suite. It could be more useful for DeFi protocols when the contract computes interest rates, implements a bonding curve, calculates collateralization ratios, or handles token pricing, etc.
These calculations often involve sequences of multiplications and divisions where precision matters. Rounding errors can occur. Division before multiplication can round intermediate results to zero. Symbolic testing verifies your math is correct across the entire input space, not just the round numbers you thought to test.
Symbolic testing can be also useful for if your contract manages state transitions like vesting schedules, governance proposals with multiple stages, or auction states, you have invariants that must hold between all valid state transitions. Symbolic testing helps verify that no sequence of valid function calls can leave your contract in an invalid state. This is harder with fuzzing because the exact sequence needed to break an invariant might be extremely unlikely to generate randomly.
Managing Constraints and Assumptions
Similar to Fuzz/Invariants tests, symbolic tests requires careful management of constraints.
We can use vm.assume() to make sure we only feed the valid inputs to the methods. For ex, if your function requires amount > 0, we can use vm.assume(amount > 0) at the start of your test to avoid false positives. We can also constrain inputs to reasonable ranges like vm.assume(amount < type(uint128).max) to keep calculations in safe range and it also provides a better performance. Also, be careful not to over-constrain otherwise you might miss some bugs as the search space will be too narrow.
Here's a good pattern:
function check_withdrawal(uint256 amount, uint256 userBalance) public {
    // Prevent expected reverts
    vm.assume(amount > 0);
    vm.assume(userBalance > 0);

    // Prevent overflow in calculations
    vm.assume(amount < type(uint128).max);
    vm.assume(userBalance < type(uint128).max);

    // Logical preconditions
    vm.assume(amount <= userBalance);

    // assert
    vault.withdraw(amount);
    assert(vault.totalSupply() >= 0);
}
Demo: Symbolic Testing with Halmos
Halmos is a symbolic testing tool built for Solidity that integrates directly with Foundry. It takes your existing Foundry tests and executes them symbolically instead of with concrete values. You write tests in Solidity using the same vm.assume() and assert() syntax you already know from Foundry.
There are other tools like Mythril and Manticore for bytecode-level analysis. Each has tradeoffs in speed, ease of use, and what they can verify.
We're focusing on Halmos because it has the lowest friction for Solidity developers already using Foundry. You can learn more about Halmos at the official repo and explore other symbolic execution tools in this detailed comparison post.
We'll use a simplified version of the Popsicle Finance accounting bug, where a transfer operation could create value out of thin air due to incorrect reward accounting.
The example contract implements a simple staking logic where users deposit shares and earn rewards proportionally. The contract tracks fees per share globally and updates each user's reward debt when they interact with the system.
contract MiniPopsicle {
    struct UserInfo {
        uint64 shares;           // LP tokens held by user
        uint64 paidPerShare;     // snapshot of globalFeesPerShare at last update
        uint256 rewardsDebt;     // rewards already credited
    }

    uint64 public totalShares;
    uint64 public globalFeesPerShare;
    mapping(address => UserInfo) public users;

    function _updateUser(address user) internal {
        UserInfo storage u = users[user];

        if (u.shares > 0) {
            uint64 delta = globalFeesPerShare - u.paidPerShare;
            u.rewardsDebt += uint256(u.shares) * uint256(delta);
            u.paidPerShare = globalFeesPerShare;
        } else {
            u.paidPerShare = globalFeesPerShare;
        }
    }

    function deposit(address to, uint64 amount) external {
        require(amount > 0, "amount=0");
        _updateUser(to);

        UserInfo storage u = users[to];
        u.shares += amount;
        totalShares += amount;
    }

    function addFees(uint64 rewardPerShareIncrement) external {
        require(totalShares > 0, "no shares");
        globalFeesPerShare += rewardPerShareIncrement;
    }

    // BUG: Missing _updateUser calls for both sender and receiver
    function transfer(address from, address to, uint64 amount) external {
        UserInfo storage uFrom = users[from];
        UserInfo storage uTo = users[to];

        require(uFrom.shares >= amount, "not enough shares");

        uFrom.shares -= amount;
        uTo.shares += amount;
    }

    function pendingRewards(address user) public view returns (uint256) {
        UserInfo storage u = users[user];
        uint64 delta = globalFeesPerShare - u.paidPerShare;
        return u.rewardsDebt + uint256(u.shares) * uint256(delta);
    }

    function totalWorth(address user) external view returns (uint256) {
        UserInfo storage u = users[user];
        return uint256(u.shares) + pendingRewards(user);
    }
}
The transfer function moves shares between users but doesn't call _updateUser() for either party. This means if the recipient has an outdated paidPerShare value, they'll get credit for rewards on the transferred shares that they shouldn't receive. A transfer can create value.
Let's test this property with Halmos. We want to verify that transferring shares between two users never increases their combined total worth:
contract MiniPopsicleTest is Test {
    MiniPopsicle pops;

    address constant OLD = address(0x1);
    address constant NEW = address(0x2);

    function setUp() public {
        pops = new MiniPopsicle();
    }

    function check_transferDoesNotIncreaseTotalWorth(
        uint64 depOld,
        uint64 depNew,
        uint64 feesPerShareIncrement,
        uint64 transferAmount
    ) public {
        // Constrain inputs to valid ranges
        vm.assume(depOld > 0);
        vm.assume(depNew > 0);

        uint64 halfMax = type(uint64).max / 2;
        vm.assume(depOld <= halfMax);
        vm.assume(depNew <= halfMax);

        vm.assume(feesPerShareIncrement > 0);
        vm.assume(transferAmount > 0);
        vm.assume(transferAmount <= depNew);

        // Scenario: OLD deposits first at globalFeesPerShare = 0
        pops.deposit(OLD, depOld);

        // Fees accumulate
        pops.addFees(feesPerShareIncrement);

        // NEW deposits later at higher globalFeesPerShare
        pops.deposit(NEW, depNew);

        // Record combined worth before transfer
        uint256 worthBefore = pops.totalWorth(OLD) + pops.totalWorth(NEW);

        // Transfer from NEW to OLD
        pops.transfer(NEW, OLD, transferAmount);

        // Record combined worth after transfer
        uint256 worthAfter = pops.totalWorth(OLD) + pops.totalWorth(NEW);

        // Property: transfer should not create value
        assert(worthBefore >= worthAfter);
    }
}
We're using vm.assume() to prevent zero values, avoid uint64 overflow when adding deposits, and ensure the transfer amount doesn't exceed what NEW holds. These constraints focus the symbolic engine on the actual logic bug rather than arithmetic overflows or reverts.
The bug is "if you give rewards to early users per share, then allow transfers of shares without updating accounting, recipients can collect rewards for time periods before they owned the shares."
Let's invoke halmos to see the results:
halmos --match-contract MiniPopsicleTest --match-test check_transferDoesNotIncreaseTotalWorth
Halmos treats all four parameters as symbolic values and explores the execution paths. In less than a second, it finds a counterexample:
Running 1 tests for test/symbolic/MiniPopsicleTest.t.sol:MiniPopsicleTest
Counterexample:
    p_depOld_uint64 = 0x4000000000000000
    p_depNew_uint64 = 0x4000000000000000
    p_feesPerShareIncrement_uint64 = 0x8000000000000000
    p_transferAmount_uint64 = 0x4000000000000000
[FAIL] check_transferDoesNotIncreaseTotalWorth(uint64,uint64,uint64,uint64) (paths: 13, time: 0.90s, bounds: [])
Symbolic test result: 0 passed; 1 failed; time: 0.92s
From the output we can see that Halmos explored 13 execution paths through our test in 0.90 seconds and found concrete values that violate the assertion. It also provides counter examples that makes the test fail.
The exact numeric value doesn’t matter, the symbolic execution picks any values that make the property fail. Even tiny values (like depOld = 1, depNew = 1, fee = 1, transfer = 1) also violate the property, but the solver is free to return any satisfying model.
If we fix the code and try again the halmos run passes.
function transfer(address from, address to, uint64 amount) external {
    _updateUser(from);  // Update sender's rewards
    _updateUser(to);    // Update receiver's rewards

    UserInfo storage uFrom = users[from];
    UserInfo storage uTo = users[to];

    require(uFrom.shares >= amount, "not enough shares");

    uFrom.shares -= amount;
    uTo.shares += amount;
}
If we run the Halmos test again after fixing the contract, the run succeeds.
[PASS] check_transferDoesNotIncreaseTotalWorth(uint64,uint64,uint64,uint64) (paths: 12, time: 4.76s, bounds: [])
Symbolic test result: 1 passed; 0 failed; time: 4.78s
Halmos explored all the same paths but cannot find any combination of inputs that violates the assertion. The property holds.
Conclusion
Symbolic testing bridges the gap between traditional testing and formal verification. The key is to know when to apply it. Focus symbolic testing on financial calculations, access control logic, state machine transitions, and critical invariants. These are the areas where arithmetic bugs, edge cases, and subtle logical errors hide. Don't waste symbolic testing on simple getters, basic proxies, or contracts without complex computation.
I'd suggest you to integrate symbolic testing gradually into your pipeline. Write unit tests and fuzz tests first during development. You can slowly build symbolic tests once code is ready for audit or even you can add them when audits are underway.
Also be mindful of the limitations. Path explosion means you need to constrain inputs carefully. SMT solvers struggle with complex non-linear arithmetic and unbounded loops. Large contracts and long transaction sequences may timeout. When tests fail or timeout, don't just increase the timeout: simplify the test, narrow the constraints, or break the contract into smaller testable pieces.
Once you understand how the tool behaves, expand coverage to more functions. Over time, you'll develop intuition for what symbolic testing can verify effectively and what's better tested with other methods.
Resources
To learn more about symbolic testing and related tools, feel free to explore these resources:
- Halmos Documentation: github.com/a16z/halmos - Official docs with examples and getting started guide
- Symbolic Execution for Ethereum: hackmd.io/@SaferMaker/EVM-Sym-Exec - Comprehensive comparison of symbolic execution tools
- Formal Methods Curriculum: github.com/WilfredTA/formal-methods-curriculum - Deep dive into symbolic execution theory and exercises
- Real-world Halmos Examples: github.com/igorganich/halmos-helpers-examples - Production audit reproductions with Halmos
Branching Tree Technique
Unlike previous chapters, the Branching tree technique is not a testing method. It's a testing methodology.
Most developers test their smart contracts by implementing a feature first, then adding test cases after. This works for small projects but creates problems as codebases grow.
I'd call the traditional testing as a reactive approach. The challenges become more evident as the project matures:
- Linear and disconnected: Tests exist as separate functions without a clear relationship, making it difficult to understand their coverage.
- Difficult to visualize: Without a systematic approach, the full range of possible states and transitions becomes hard to track.
- Prone to gaps: Critical edge cases often go unnoticed when testing isn't planned comprehensively from the start
- Hard to maintain: As contracts evolve, understanding which tests cover which scenarios becomes more challenging.
The Branching Tree Technique aims to fix this. It's more of a proactive approach. Instead of writing tests after implementation, BTT leans more towards a test-driven development approach encouraging developers to identify all possible branches of execution, states, and edge cases before implementing tests.
What is the BTT?
The Branching Tree Technique represents test cases as a hierarchical tree structure where:
- Nodes represent states or conditions in your contract
- Branches represent different paths or decisions
- Leaves represent concrete test cases that should be implemented
This explicit mapping of the testing space brings structure and clarity to what can otherwise be a chaotic process. Instead of thinking about individual test functions in isolation, BTT encourages you to think about the complete state space of your contract.
It was first introduced by Paul R Berg in 2022, co-founder of Sablier Labs in their Sablier V2 Codebase.
BTT operates by creating a specification in a .tree file, using a tree-like structure denoted by ASCII characters such as ├ and └ for branches. The specification outlines:
- Contract State: Defined using "given," which prepares the contract state in advance (e.g., "Given the contract is initialized").
- Function Parameters and Execution Modes: Specified with "when," covering user-controlled inputs or execution modes (e.g., "When input is valid").
- Expected Behaviors: Described with "it," stating the expected outcome or assertion (e.g., "It should return true").
Benefits and Advantages
BTT fundamentally changes how we approach Solidity testing:
- Improved coverage: By explicitly modeling the state space, you're less likely to miss important test cases
- Documentation: The tree structure serves as living documentation of your contract's behavior
- Easier maintenance: When contract logic changes, you can update the tree rather than hunting through disconnected tests
- collaboration: Team members can better understand and contribute to testing efforts with a visual representation
- Automation: The structured format supports automated test generation, reducing manual effort and potential errors, with tools like Bulloak facilitating this process.
Comparison with other frameworks:
The below table was taken from Paul's BTT Presentation:
| Framework | Level | Effectiveness | Learning Curve |
|---|---|---|---|
| BTT | Entry-level | Moderate | Low |
| Cucumber Gherkin | Medium-level | Moderate | Medium |
| Certora | Senior-level | High | High |
| TLA+ | Senior-level | High | High |
Implementing BTT with Bulloak
Bulloak is an tool that automates the generation of Solidity test files from a BTT specification. Here's how it works:
- You create a
.treefile that specifies your test structure - Bulloak parses this file and generates scaffolded test files
- You fill in the implementation details for each test case
For instance, an example specification might look like:
FooTest
└── When stuff is called
    └── When a condition is met
        └── It should revert.
            └── Because we shouldn't allow it.
This structure is then processed by tools like Bulloak, which generates a skeleton Solidity test file.
// $ bulloak scaffold foo.tree

pragma solidity 0.8.0;

contract FooTest {
    modifier whenStuffIsCalled() {
        _;
    }

    function test_RevertWhen_AConditionIsMet() external whenStuffIsCalled {
        // It should revert.
        // Because we shouldn't allow it.
    }
}
The generated code includes test functions for each condition and action, which developers can further refine.
Case Study: Sablier's BTT Approach
The Sablier protocol provides a really good example of BTT in action. Let's examine their approach to testing the collectFees functionality:
The BTT Tree Structure
Here's how Sablier structures their test cases for the CollectFees feature:
CollectFees_Integration_Test
├── when provided merkle lockup not valid
│  └── it should revert
└── when provided merkle lockup valid
   ├── when factory admin is not contract
   │  ├── it should transfer fee to the factory admin
   │  ├── it should decrease merkle contract balance to zero
   │  └── it should emit a {CollectFees} event
   └── when factory admin is contract
      ├── when factory admin does not implement receive function
      │  └── it should revert
      └── when factory admin implements receive function
         ├── it should transfer fee to the factory admin
         ├── it should decrease merkle contract balance to zero
         └── it should emit a {CollectFees} event
This structure clearly shows the primary branching decisions and expected outcomes for each scenario.
Branch 1: Invalid Merkle Lockup
The first branch tests what happens when an invalid merkle lockup is provided:
function test_RevertWhen_ProvidedMerkleLockupNotValid() external {
    vm.expectRevert();
    merkleFactory.collectFees(ISablierMerkleBase(users.eve));
}
This test directly verifies that the contract properly rejects invalid inputs. Notice how the function name explicitly corresponds to the branch in the tree, making the relationship obvious.
Understanding Custom Modifiers for Branching
Before looking at the next branches, it's important to understand how Sablier uses custom modifiers to represent branches in the tree.
    modifier whenCallerAdmin() {
        // Make the Admin the caller in the rest of this test suite.
        resetPrank({ msgSender: users.admin });
        _;
    }

    modifier whenCallerCampaignOwner() {
        resetPrank({ msgSender: users.campaignOwner });
        _;
    }

    modifier whenProvidedMerkleLockupValid() {
        _;
    }
These modifiers encapsulate the preconditions for each test path, creating a direct mapping between the tree structure and the test code.
Branch 2: Valid Merkle Lockup with Non-Contract Admin
The next branch tests what happens when the merkle lockup is valid and the factory admin is not a contract:
function test_WhenFactoryAdminIsNotContract() external whenProvidedMerkleLockupValid {
    testCollectFees(users.admin);
}
This test uses the whenProvidedMerkleLockupValid (empty) modifier. It then delegates to a helper function testCollectFees to check the expected behaviors for this scenario.
Shared Test Helper for Common Assertions
Sablier uses a helper function to encapsulate assertions that are reused across multiple test cases:
function testCollectFees(address admin) private {
    // Load the initial ETH balance of the admin.
    uint256 initialAdminBalance = admin.balance;
    // It should emit a {CollectFees} event.
    vm.expectEmit({ emitter: address(merkleFactory) });
    emit ISablierMerkleFactory.CollectFees({ admin: admin, merkleBase: merkleBase, feeAmount: defaults.FEE() });
    // Make Alice the caller.
    resetPrank({ msgSender: users.eve });
    merkleFactory.collectFees(merkleBase);
    // It should decrease merkle contract balance to zero.
    assertEq(address(merkleBase).balance, 0, "merkle lockup ETH balance");
    // It should transfer fee to the factory admin.
    assertEq(admin.balance, initialAdminBalance + defaults.FEE(), "admin ETH balance");
}
This helper performs three key assertions matching our tree's leaf nodes:
- Verifies the correct event is emitted
- Confirms the merkle contract balance is zeroed
- Checks that the fee is transferred to the admin
By encapsulating these common assertions, Sablier reduces code duplication while maintaining the conceptual integrity of the tree structure.
Branch 3: Contract Admin Without Receive Function
The next branch tests what happens when the admin is a contract that doesn't implement a receive function:
function test_RevertWhen_FactoryAdminDoesNotImplementReceiveFunction()
    external
    whenProvidedMerkleLockupValid
    whenFactoryAdminIsContract
{
    // Transfer the admin to a contract that does not implement the receive function.
    resetPrank({ msgSender: users.admin });
    merkleFactory.transferAdmin(address(contractWithoutReceiveEth));
    // Make the contract the caller.
    resetPrank({ msgSender: address(contractWithoutReceiveEth) });
    vm.expectRevert(
        abi.encodeWithSelector(
            Errors.SablierMerkleBase_FeeTransferFail.selector,
            address(contractWithoutReceiveEth),
            address(merkleBase).balance
        )
    );
    merkleFactory.collectFees(merkleBase);
}
This test uses both the whenProvidedMerkleLockupValid and whenFactoryAdminIsContract modifiers to establish the parent branch conditions. It then sets up the specific scenario (a contract admin without a receive function) and verifies that the contract reverts with the expected error.
Notice how the test code carefully manages state to create the exact conditions represented by this branch in the tree.
Branch 4: Contract Admin With Receive Function
The final branch tests what happens when the admin is a contract that implements a receive function:
function test_WhenFactoryAdminImplementsReceiveFunction()
    external
    whenProvidedMerkleLockupValid
    whenFactoryAdminIsContract
{
    // Transfer the admin to a contract that implements the receive function.
    resetPrank({ msgSender: users.admin });
    merkleFactory.transferAdmin(address(contractWithReceiveEth));
    testCollectFees(address(contractWithReceiveEth));
}
Like the previous test, this one uses both parent branch modifiers. It then sets up the specific scenario (a contract admin with a receive function) and reuses the testCollectFees helper to verify the expected behaviors.
Key Insights
Sablier's approach demonstrates several powerful techniques for implementing BTT:
-
The use of modifiers like
whenProvidedMerkleLockupValidandwhenFactoryAdminIsContractdirectly maps the tree structure to code and enforces branch preconditions. -
Function names like
test_RevertWhen_FactoryAdminDoesNotImplementReceiveFunctionclearly indicate which branch they're testing. -
Each test function carefully sets up the state required for its specific branch, using functions like
resetPrankandtransferAdmin. -
The
testCollectFeeshelper function avoids duplication for common test assertions while preserving the tree structure's integrity. -
Every path in the tree is explicitly tested, ensuring comprehensive coverage of all scenarios.
Learning from Sablier's Approach
For developers looking to implement BTT in their own projects, Sablier's approach suggests several best practices:
- Create custom modifiers that represent the branches in your tree
- Name test functions to clearly indicate which branch they represent
- Use helper functions for common assertions without sacrificing clarity
- Carefully manage state to ensure each test runs in the correct context
- Ensure every branch in your tree has corresponding test coverage
By following these patterns, developers can create test suites that are comprehensive, maintainable, and directly traceable to their BTT specifications.
Conclusion
The Branching Tree Technique represents a significant improvement in how we approach Solidity testing. By explicitly listing the state space of the contracts and generating structured tests, we can achieve better coverage, clearer documentation, and easier maintenance.
Whether you're working on a simple escrow contract or a complex DeFi protocol, BTT can help ensure your contracts behave as expected under all conditions. The visual nature of the approach also makes it easier to communicate testing strategies with team members and stakeholders.
I really recommend you to try BTT on your next project. Start with a simple contract, map out its behavior as a tree, and experience the clarity and confidence that comes from a more structured testing approach. You'll thank yourself for the modelling the tests in a more structured way!
Resources
- Paul Berg's Presentation
- Bulloak repo Discussions
- VSCode Solidity Inspector extension for tree files syntax highlighting and bulloak support.
- BTT Examples
The Swiss Cheese Method
We've covered a lot of ground in this guide. Unit tests, fuzz tests, invariants, formal verification and more. But the thing that keeps most of the devs up at night is the fact that no single testing method is perfect.
During Devconnect 2022 at Istanbul, I was chatting with Farhaan, smart contracts tech lead for Maple Finance about various testing practices and that's when he shared about the Swiss cheese model. So I started reading that and exploring how to apply it for smart contract testing.
The Swiss Cheese model comes from aviation safety, but it applies to software security as well. Picture a bunch of slices of Swiss cheese stacked together. Each slice represents a different testing or security technique, and the holes in the cheese are the bugs and vulnerabilities that slip through.
Here's the idea: the holes in each slice are in different places. So even though your unit tests might miss something, your integration tests might catch it. And if both of those miss it, maybe your invariant testing might flag it. Or your auditor will spot it. Or your monitoring will catch it in production.
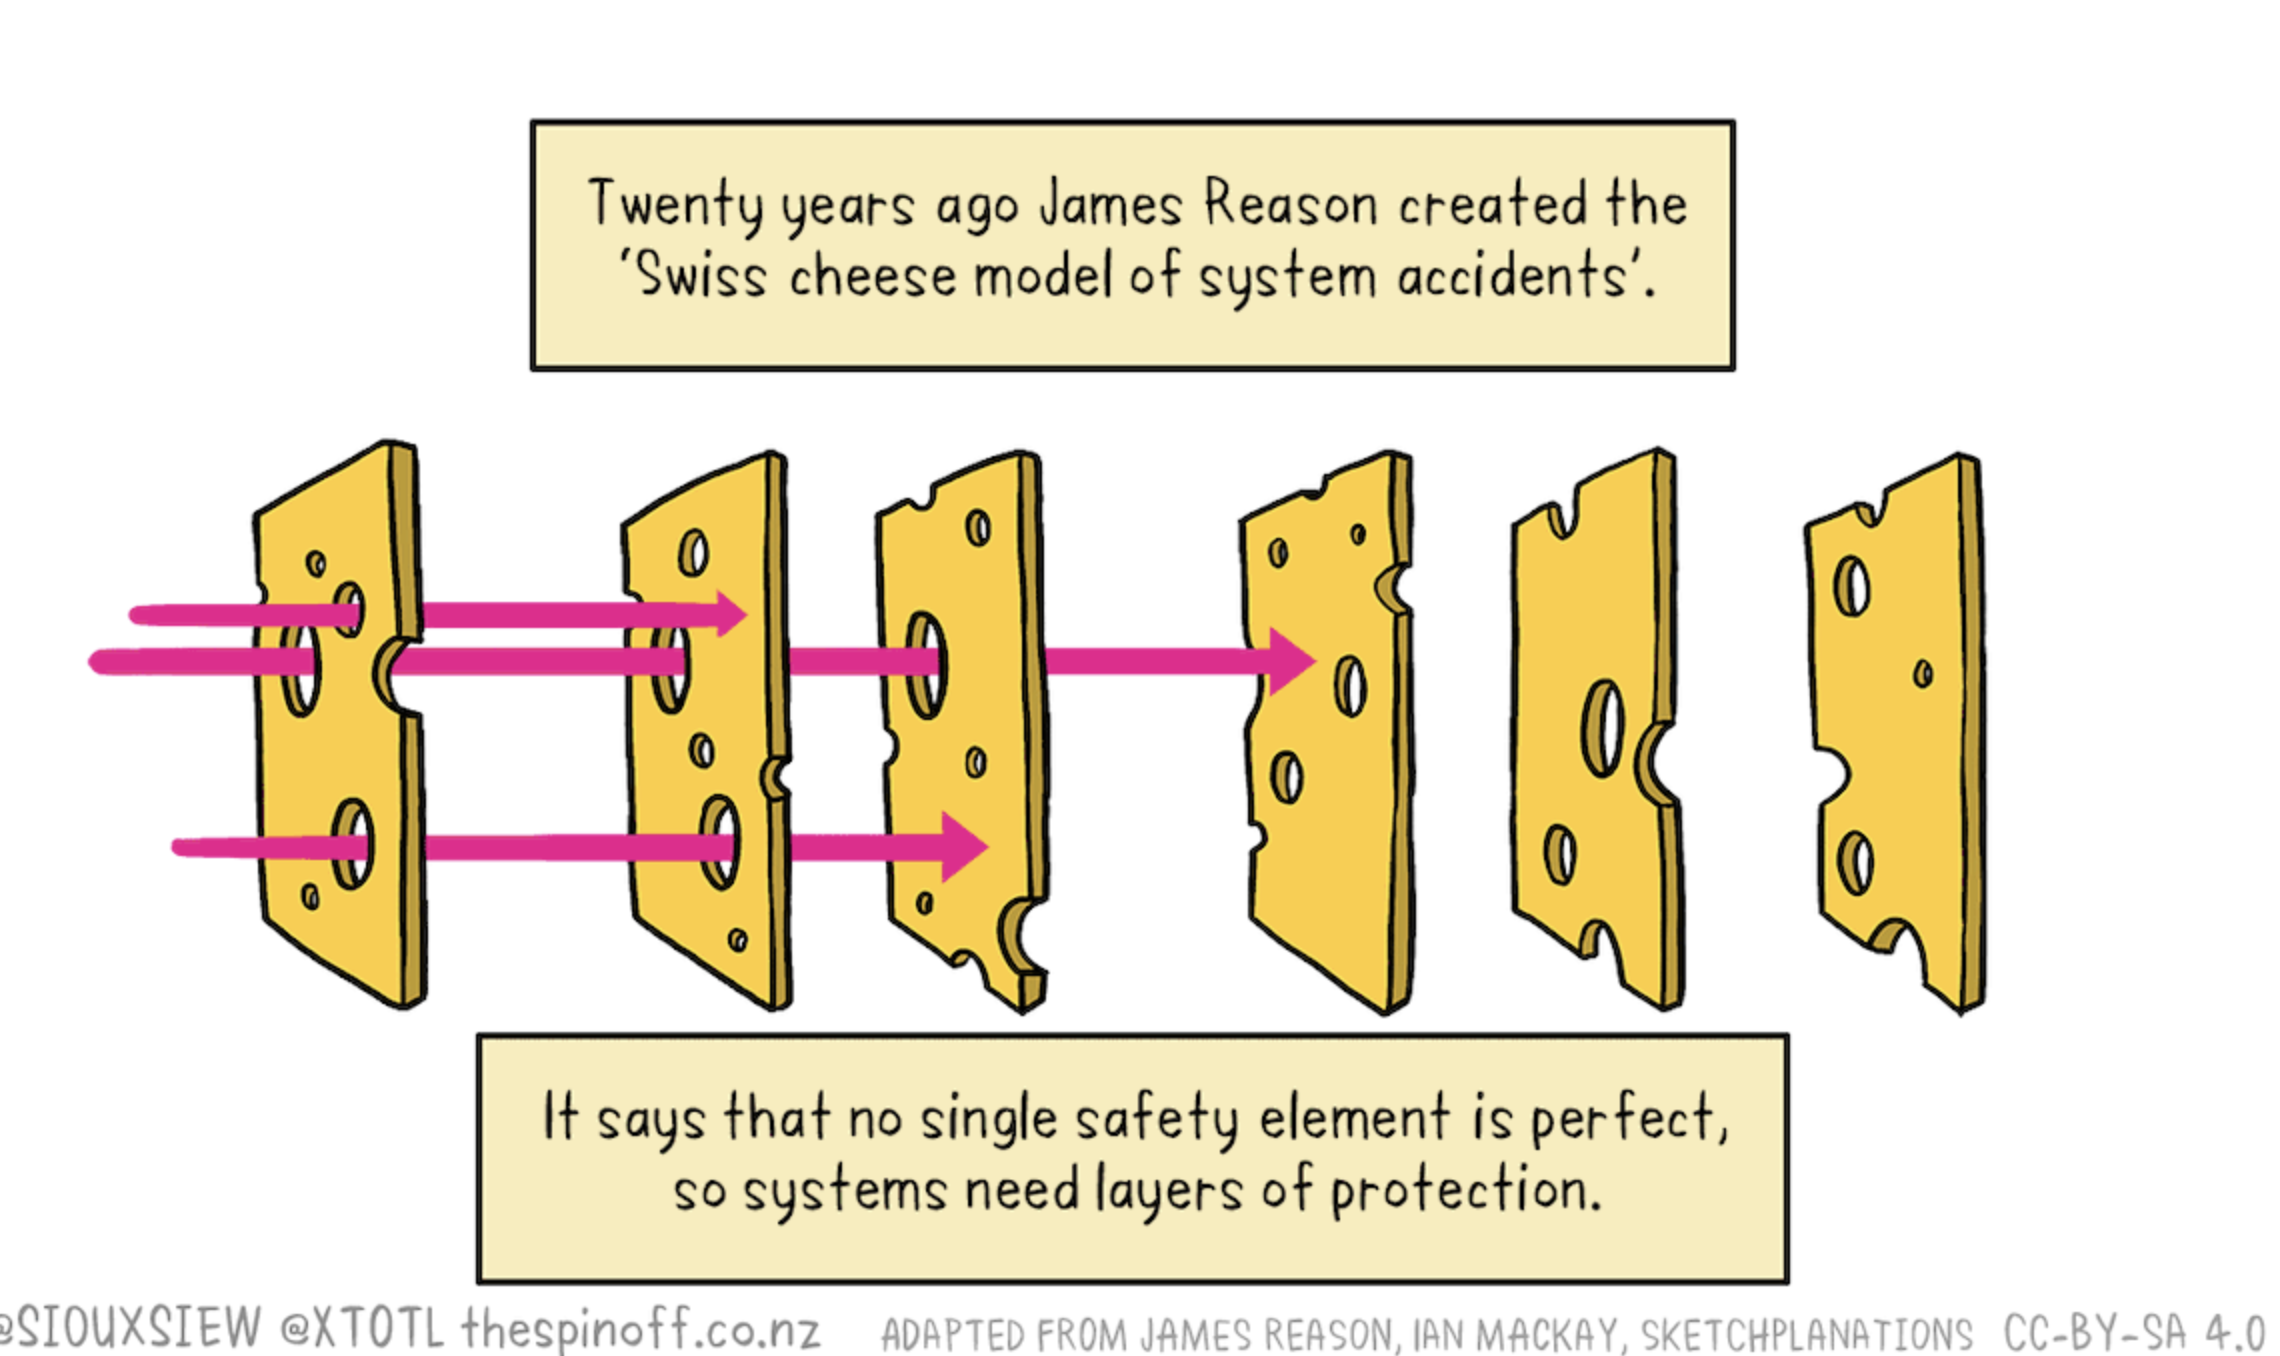
When you stack enough slices together, with the holes in different spots, it becomes really hard for a bug to slip through all the layers. It's not about making any single layer perfect, it's about having enough layers that the odds of everything aligning just right for a bug to sneak through become tiny.
Why This Matters?
Smart contracts are also software with a difference that they handle real money, and they're under constant attack. A single missed bug can cost millions. Remember the DAO? The Ronin bridge exploit? These weren't cases of bad developers – they were good devs who just didn't catch everything.
The problem is that different types of bugs need different techniques to find them. Logic errors show up differently than arithmetic issues. Upgrade problems and access control bugs are different. Economic exploits are completely different from technical vulnerabilities.
If you only rely on basic testing techniques, you're basically hoping that the holes in that one slice of cheese happen to not align with where the bugs are.
Balancer v2 suffered a $100 million exploit even after several audits and testing. So no code is 100% safe out there.
How the Layers Work Together
Here's how different layers can safe guard against different issues:
Layer 1: Basic Testing
-
Unit tests catch basic logic errors and obvious bugs. They're your first line of defense and they're fast to run, so you run them constantly during development. But they test things in isolation, which means they might miss how components interact.
-
Integration tests pick up where unit tests leave off. They catch issues that only appear when multiple contracts talk to each other. Like when your vault contract trusts the price oracle a bit too much, or when the token contract's callback behavior breaks your accounting.
-
Fork testing against mainnet state catches integration issues with real protocols and real conditions. Your protocol might work perfectly in your test environment but can break when interacting with the actual state of Aave or Uniswap.
Layer 2: Property-Based Testing
-
Fuzz testing throws random concrete values at your functions and finds those edge cases you never thought about. Like what happens when someone passes in
uint256.maxor zero or some weird number that causes an overflow, etc., -
Invariant testing (stateful fuzzing) runs sequences of random actions and checks that your system's fundamental rules always hold true. This catches bugs that only appear after a specific sequence of events.
Layer 3: Advanced Testing
-
Lifecycle and Scenario Tests simulate the full lifetime of your protocol. They ensure that the contract behaves correctly over time, especially as it moves through different states and handles a sequence of operations that might occur during its lifespan.
-
Mutation Tests change your code to introduce bugs, then check if your tests catch them. If your tests still pass after you flip a critical condition, your tests aren't good enough. This tests the quality of your tests themselves.
-
Differential Testing implements the same logic in different languages or different ways and checks they give the same results. Useful for complex math where you can write a simpler reference implementation in Python or Typescript and compare against your optimized Solidity version.
-
Formal verification & Symbolic Testing mathematically proves certain properties, which is important for critical calculations. But it's expensive and time-consuming, so you use it for the really critical bits like your accounting logic or access control.
Layer 4: Post deployment
-
External Audits
-
Monitoring watches your contracts in production. Critical monitoring alerts you when something's wrong. Informational monitoring tracks normal behavior so you can spot anomalies.
-
Bug Bounty Programs - This is important to make sure security researches keep scanning your code for potential vulnerabilities.
-
Red Teaming - Internally form teams and attempt to exploit your protocol like real attackers would. This could help you find attack paths you didn't consider during development.
The layers go from fast/cheap/automated (Layer 1) to slow/expensive/manual (Layer 4). You run Layer 1 constantly, Layer 2 regularly, Layer 3 before major releases, and Layer 4 is ongoing throughout the protocol's lifetime.
What the Swiss Cheese model tells us is that we should be intentional about which layers we use and understand what each layer does and doesn't catch. For a simple contract, maybe unit tests plus fuzz testing plus an audit is enough. For a complex protocol, you might want the full stack.
The key is that you shouldn't put all your faith in any single layer. I've seen teams that think "we have 100% code coverage!" and ship with confidence, only to get rekt because coverage doesn't catch logic errors. I've seen teams that think "we had three audits!" and still get exploited because audits don't catch economic attacks that span multiple blocks.
Keep updating your test suite
One more thing that's crucial to understand: this isn't a one-and-done thing. The Swiss Cheese model is ongoing. You deploy with multiple layers of defense, but those layers need maintenance.
Your test suite needs to grow as you add features. Your monitoring needs to adapt as attack patterns evolve. Your invariants need updating when your system's fundamental rules change. When you do an upgrade, you need to run your whole testing stack again.
And here's something that doesn't get talked about enough: the different layers inform each other. When your monitoring catches something weird in production, that should feed back into your test suite. When an auditor finds an issue, that should inform what your invariant tests check for. When fuzz testing finds an edge case, that should become a unit test.
Accepting Imperfection
The hardest part about the Swiss Cheese model might be psychological. It requires accepting that none of your testing will be perfect. Your tests will have bugs. Your auditors will miss things. Your monitoring will have blind spots.
But that's okay. That's the whole point. By accepting that each layer is imperfect but valuable, you build a system that's much stronger than if you'd tried to perfect any single layer.
I've seen protocols that were "only" 90% tested according to the metrics, but they used a good mix of unit tests, integration tests, fuzzing, invariants, and had multiple audits plus monitoring. They've been running in production for years without issues.
Your Testing Philosophy
At the end of the day, the Swiss Cheese model is really about developing a mature testing philosophy. It's about understanding that security and correctness aren't binary states you achieve – they're ongoing efforts requiring multiple complementary approaches.
Every technique we've covered in this guide – from basic unit tests to advanced formal verification – is a slice of cheese. Some slices are thicker than others. Some are more expensive to add to your stack. Some fit better with certain types of projects.
Your job as a developer is to understand what each technique brings to the table, where its blind spots are, and how to combine techniques to cover each other's weaknesses. That's what building confidence in your system really means.
Not that you've eliminated all possible bugs – that's impossible. But that you've done your due diligence across multiple dimensions, and that you have monitoring and response mechanisms in place for the things that might slip through.
Moving Forward
So where do you go from here? Start by auditing your current testing approach. Be honest about what you're doing and what you're not. Identify the gaps. Think about what types of bugs your current testing would miss.
Then start filling in those gaps. You don't need to implement everything at once. Add fuzzing to your test suite. Write some invariants. Set up fork testing. Each layer you add makes your system more robust.
The ecosystem is constantly evolving. New attack vectors emerge. New testing tools become available. Keep learning, keep adapting, and keep stacking those slices of cheese.
Because at the end of the day, building secure smart contracts isn't about being perfect. It's about being thorough, thoughtful, and humble enough to know that you need multiple perspectives and approaches to build something that can be trusted with people's money.
Stay safe out there, and happy testing!